Thursday, May 19, 2011

orange marmalade

IMG_0164

So, obviously, by "soon" I meant I'd get this post up in a month. I'm sorry I've been so sparse lately. I have been cooking (quite a lot; let me tell you sometime about the cupcake-birthday-cake that I shaped and frosted like the Settlers of Catan game board-- or the Portal-themed cake (yes, it was a lie)-- or the war won ton soup that actually tasted like war won ton soup) but my camera's an angsty little old thing and so I don't have anything pretty to post up for you.

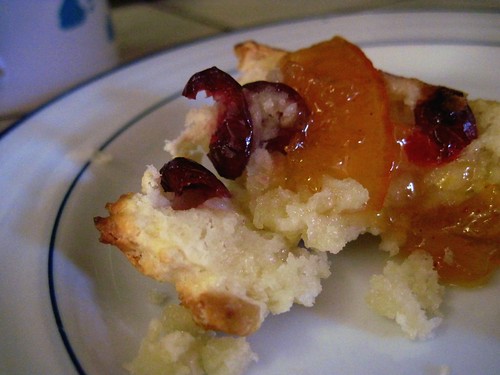
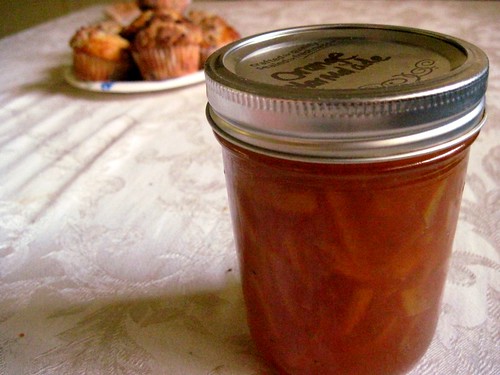
This I made back in Christmastime, though, for Mum, who is a huge orange marmalade fan. As a child, I never liked it, but after this I think I've been converted to its golden, sticky, bittersweet ways.

IMG_0183

Marmalade comes from Greek quince jam (which was subsequently adopted by the Romans), called "marmelo." This means honey-fruit, as the quince was too bitter to be made into jam without honey.

In other countries, marmalade can refer to any fruit preserves, but in the majority of English-speaking cultures it refers primarily to citrus-based jams.

This recipe is adapted from Alton Brown's (yes, I am a Good Eats junkie. I accept this about myself). I swapped out some of the water for orange juice, and added cinnamon, salt, and a little pepper. Trust me, the pepper works.


Orange Marmalade

Adapted from AB's recipe: http://www.foodnetwork.com/recipes/alton-brown/orange-marmalade-recipe/index.html
4-5 large oranges
zest and juice of one lemon
2 C orange juice
4 C water
3 pounds plus 12 oz sugar
1 tsp cinnamon
1/2 tsp salt
a few grates of black pepper

canning jars (found in most grocery stores)
candy thermometer

Slice oranges into very thin disks. If you have a mandolin, that will be useful, but otherwise you can make due with a sharp knife. The slices should ideally be about 1/8th of an inch thick, but don't stress too much about it. Just try to make the slices all about the same size. Quarter those slices.

Put into a large pot with the lemon zest and juice, orange juice, and water. Boil for 10 minutes, then reduce heat to a simmer and let cook for 40 minutes. The fruit should be soft.

Meanwhile, fill a separate pot with water and the canning jars and lids. Bring to a rolling bowl for 10 minutes, then turn off the heat and let sit until the marmalade is done. This is to sterilize the jars.

Put a plate in the freezer. You'll need this later to check the marmalade.

Return the oranges to a boil. Add the sugar, cinnamon, salt and pepper and cook until the mixtures reaches 222 or 223 degrees. This should take 10-15 minutes. The way you test the marmalade's doneness is to put a teaspoon on the chilled plate and let sit for half a minute. Tilt the plate. If the marmalade runs, keep cooking. If it wobbles like a gel, you're done. (Imagine what you want your tasty, spreadable marmalade to look like; that's about the consistency it should come to on the chilled plate). Take it off the heat.

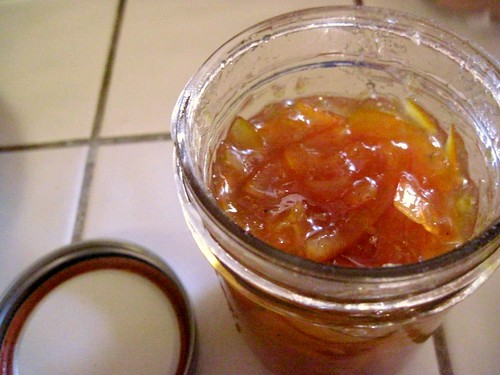
Place a towel out on the counter. Using a pair of tongs, remove your jars from the hot water and set them out, upright, on the towel. Ladle in marmalade until there's about half an inch of air gap left between the jam and the top of the jar. Use the tongs to put on the lids and then screw them gently tight.

IMG_0160

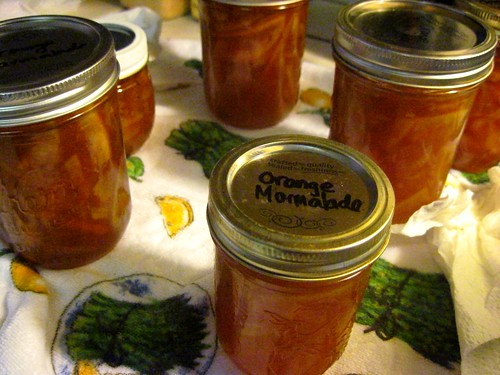
Return the filled jars to the water. Bring the water to a boil again. Boil each jar 10 minutes. This will seal them. Remove from water and let sit until cool. If any of the lids are not flat and taut, then that jar didn't steal. Don't worry, just stick it in the fridge and eat it immediately. The other jars will stay good on the shelf for a few months. Once open, they must be refrigerated as well.

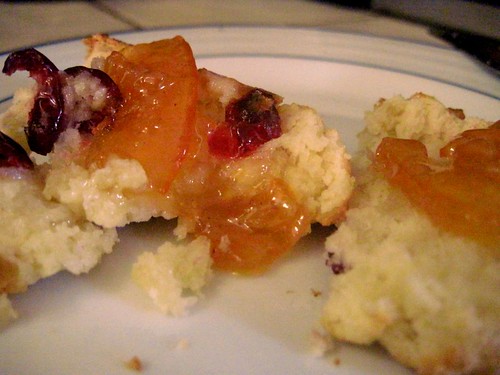
The marmalade is sweet and candy-like with a bitter edge. I'm a big fan. I hope you will be, too.

Tuesday, April 12, 2011

cranberry scones

IMG_0192

One of my favorite baking blogs is Joy Of Baking. The cream scone recipe I based these on is the recipe that won me over to them. In high school I would wake up early, make miniature scones out of this recipe and feed my friends and teachers (who are also friends) all morning. I make them for tea parties, for parties without tea, or as medium of jar-to-mouth transfer for the orange marmalade I made for Mum.

An orange marmalade recipe should be coming soon. Because it was delicious.

IMG_0186

Cranberry Scones

http://www.joyofbaking.com/scones.html

2 C flour
1/4 C sugar
2 tsp baking powder
1/3 C cold salted butter

1 egg
1 tsp vanilla
1/2 C milk (I use nonfat, but you can go up to cream if you want)

Mix the flour, sugar, and baking powder in a medium bowl.

Slice up the cold butter into chunks, then toss it into the flour. This is the most labor intensive part of the process, but the result is so entirely worth it and this part will only take you a few minutes. Coat the butter in the flour mixture, then use your thumbs and fingers to rub it into the flour. I take handfuls of flour/butter and rub my thumb and the edge of my forefinger together, pushing flour/butter through them. Do this until the flour/butter mixture looks like pea-size crumbs.

You can also use a pastry cutter for the above step, but I don't own one.

Next, mix the cranberries into the flour (or mix inwhatever other goodies you want to include: chocolate chips, candied ginger, raisins, currants, (really, any dried fruit works), fresh or frozen berries, nuts, etc).

In a small separate bowl, beat together the egg, vanilla and milk with a fork.

Make a well in the middle of the flour/butter/cranberries and pour the egg/vanilla/milk into it. Stir very briefly, only enough combine it. The less you mix, the more tender the scones will be because there will be less gluten formation (the awesome protein web that flour spins in your baked goods. Less awesome if you're gluten-allergic or have celiacs--but please don't make this if you have either of those!).

Drop 1/3 cup-fuls (for child's-palm-sized scones) onto a cookie sheet. Bake at 375 for about 15 minutes or until golden. To check doneness, lift one up and make sure its bottom is dry.

If you make the scones smaller, cook them for less time.

IMG_0187

Serve warm or cold (but preferably warm), with butter, jam, marmalade, Devonshire cream, or some combination.

Omit the sugar and you should have a kind of biscuit creation you could serve with a savory meal. But I like sugar, so I haven't tried this yet.

P.S. To make faux-Devonshire cream, lightly beat whipping cream to soft peaks and add a little lemon or lime zest. Soft peaks: when you take the beaters out of the cream and turn them upside down, there should obviously be peaks but the peaks should fall over under gravity.

Friday, February 4, 2011

pate a choux filled with chocolate cream

IMG_0240

These were made alongside the eclairs. They share the same dough, pate a choux, which is a hot water pastry that you cook on the stove and then bake at a high temperature.

Half I filled with creme patisserie and dipped in melted chocolate; you can see the resulting eclair "puffs" here. The other half you see before you: hollow, still-warm-from-the-oven pastry filled to the gills with a creamy chocolate pudding and drizzled with melted chocolate.

(You could chill them, too, and serve them that way. I think they'd taste delightful in a slightly different way, but these didn't survive fifteen minutes so I can't say so with any certainty).

These are not one of those chocolate desserts where you can only have three bites and then you can hardly breathe or think for the pure utter richness of it. In other words, I wouldn't take this home to Mum.

However, if you're going for something a little lighter, this is lovely: Creamy but not heavy, sweet and almost complex with the cocoa and the milk fats and the sturdy dough all working together. It's certainly a chocolate dessert, but it's not overpowering. I think I would take this home to little sis.

Warning: after eating these, you will be covered in chocolate. But, really, is that a bad thing?

Chocolate Cream Pastry Pots
the pastry
from Catherine Atkinson's pastry cook
9 tbsp flour
pinch salt
1/4 cup butter
2/3 C water
2 eggs

Preheat 400 degrees. Measure our the flour into a cup and put it to the side. On the stove, set up your pot or your double boiler and melt the butter and water together. When they are melted, remove from the heat and dump in your flour. Stir, vigorously, until all is combined, and then return to low heat. Continue to stir vigourously for 1-2 minutes. Do NOT cook this too long. The dough will pull away a little from the sides; the best way I can describe it is that the edges will be rounder. It will stop sticking as strongly to the bottom of the pan. But don't worry too much about it; just stir for a minute and remove from the heat. You will be fine and so will your dough.

Take the dough off the heat. After it's cooled 2-3 minutes, add the eggs and beat until smooth and shiny, another couple minutes.

IMG_0230

Put the dough on a greased cookie sheet in the size and shapes you like. The dough will stay mostly in the same form as you put it on the sheet. I like just a single spoonful, but the traditional eclair is longer and bigger than I make my little cream-puff-eclairs. (You get more if you make them smaller). Bake for 25-30 minutes or until golden.

Some people slit the puffs open at this point and bake them at 200 degrees for 5 minutes, but I'm much too lazy. I imagine this is to dry them out a little more, but I find just the half hour at 400 does them fine.


The filling is from a food blog called Smitten Kitchen. A friend highly recommended the site to me recently and I've been archive-binging and generally drooling. A few dozen recipes in I stumbled across this one--a delicious pudding recipe I'd found through Google months before. I'd made it then (my first time making pudding) and loved it then. Now, a little thicker, is fills my pastry pots.

chocolate filling
from the Smitten Kitchen
1/4 cup cornstarch
1/2 cup sugar
1/8 teaspoon salt
3 cups whole milk
6 ounces 62% semisweet chocolate, coarsely chopped (I used good quality semisweet chocolate chips; use 70% bittersweet if you want more of a dark chocolate kick)
1 teaspoon pure vanilla extract

Mix milk, sugar, cornstarch and salt in a double boiler, whisking for 20-30 minutes or until thick (coats the back of a spoon). Add chocolate and let melt. Stir 2-3 more minutes.

Add vanilla. Let cool.  

construction
1/4 C chocolate
1 Tb butter

Melt the chocolate and butter together.

Unlike the eclairs, we are not piping in filling. Shove your finger or the back of a spoon through the roof of the pastry to make a wide hole. All we want left are walls. Then spoon the pudding in and drizzle on a little chocolate.

IMG_0242

Eat warm or chill. Enjoy!

Sunday, January 23, 2011

eclairs with creme patisserie filling, topped with chocolate

IMG_0235

About three people came up to me while I was making this (and one person called and asked me later) how eclairs become hollow. This confirms my suspicion that pate a choux is absolutely awesome. You don't hollow it out, you don't shape the dough. You just make the dough, plop it on the cookie sheet and bake it. When you pull it out of the oven, you have golden, crusty, hollow pastry shells ready for you to stuff with tasty wonderful cream and dip in melted chocolate.

IMG_0236
This is an eclair that's been bitten into. This is also my roommate's thumb nail, which has Totoro on it.

Isn't that about sixteen different kinds of exciting?

The pate a choux is made on the stove. It's very egg-heavy; this is where most of the structure comes from. It's very easy to over cook and curdle the dough, so you have to be careful. Using a double boiler (a metal bowl suspended over a pot of simmering water--DO NOT let the bottom of the bowl touch the water) gives you a bit of extra insurance against this, but I just do it straight in a pot. It works well enough with this recipe and I don't lose batches very often.

There are three steps here: make the dough. Bake the dough. Fill the pastry and top with chocolate (okay, so maybe that last one's two). Here we go!

Eclairs
the pastry
from Catherine Atkinson's pastry cook
9 tbsp flour
pinch salt
1/4 cup butter
2/3 C water
2 eggs

Preheat 400 degrees. Measure our the flour into a cup and put it to the side. On the stove, set up your pot or your double boiler and melt the butter and water together. When they are melted, remove from the heat and dump in your flour. Stir, vigorously, until all is combined, and then return to low heat. Continue to stir vigourously for 1-2 minutes. Do NOT cook this too long. The dough will pull away a little from the sides; the best way I can describe it is that the edges will be rounder. It will stop sticking as strongly to the bottom of the pan. But don't worry too much about it; just stir for a minute and remove from the heat. You will be fine and so will your dough.

Take the dough off the heat. After it's cooled 2-3 minutes, add the eggs and beat until smooth and shiny, another couple minutes.

IMG_0230

Put the dough on a greased cookie sheet in the size and shapes you like. The dough will stay mostly in the same form as you put it on the sheet. I like just a single spoonful, but the traditional eclair is longer and bigger than I make my little cream-puff-eclairs. (You get more if you make them smaller). Bake for 25-30 minutes or until golden.

Some people slit the puffs open at this point and bake them at 200 degrees for 5 minutes, but I'm much too lazy. I imagine this is to dry them out a little more, but I find just the half hour at 400 does them fine.

the filling: creme patisserie
from http://www.thefreshloaf.com/recipes/eclairs
1/3 cups sugar
2 tablespoons all-purpose flour
2 tablespoons corn starch
4 egg yolks
1 1/3 cups milk
3/4 teaspoon vanilla

Beat all but milk and vanilla in a medium bowl. Heat the milk in saucepan until it starts to steam, but not boil (there should be a few little bubbles beginning to form at the edges, but nothing more).

IMG_0228

Spoon the milk a little at a time into the egg mixture, stirring briskly. Continue to spoon the milk in until you've added about half of it. We combine these two slowly to keep the hot milk from making scrambled eggs of our filling.

Pour the tempered (aka slowly heated) egg and milk mixture back to the rest of the milk in the saucepan. Bring the whole mixture to a boil and boil 1-2 minutes. Remove from the stove and mix in the vanilla. Let the mixture cool.

Spoon the mixture into a plastic bag and set aside.

IMG_0232

construction; step by step
1. Melt 1/2 C chocolate and 2 tsp vegetable oil in a small bowl.
2. Cut one corner off the plastic bag of filling.
3. Pick up a pastry puff and stick your finger through one end to make a small hole.
4. Put the cut corner of the filling bag into the hole. Squeeze and fill the pastry until it is heavy and full of cream.
5. Dip the top of the eclair in the melted chocolate and put on a plate to set.

IMG_0233

The last (and favorite) step: DEVOUR.

Monday, January 17, 2011

homemade Reese's butter cups: almond butter dark chocolate cups

IMG_0217

I love making candy. There's just something about vast quantities of sugar and an attention to elegance and design I rarely get to indulge in. This isn't saying that my candies are always very pretty (more often enough they're not at all) but I like the idea that they get prettier as I go.

I found these first at a Girl Scout "Winterfest," which is several hundred adolescent girls and their troop leaders squashed into a large auditorium where they run activity booths and sell crafts. One troop specialized in plastic jars of homemade Reese's peanut butter cups and I would buy a jar each year and horde it until spring.

Turns out, however, they're fabulously easy to make; and they're fabulously easy to engineer to your own devices. These I filled with almond butter, to give friend the Snark a close-as-I-can-get taste of Reese's. (She's allergic to peanuts). I made about eighty and packaged them up for friends and family this holiday. But you can fill them with anything you want-- lemon curd, dried fruit, jam of any kind, caramel (homemade is best!), other types of chocolate; anything you want. Isn't that a lovely phrase?

Almond butter cups
about thirty cups

1 C dark chocolate
1 Tb vegetable oil

1/2 C almond butter
1/2 C sugar

You will also need mini-muffin pans and mini-muffin paper liners. You can use a normal sized muffin pan if you want big Reese's. (I have a friend who uses a pie tin.)

Line the muffin tins with the paper muffin cups.  Pour the sugar into a wide-mouthed bowl and place the almond butter next to it with a spoon or two.

Melt the dark chocolate in the microwave or over a double boiler and mix in the oil until smooth.

Spoon a little chocolate into the bottom of each muffin tin and spread evenly over the bottom and a little up the sides.

Next, drop a little almond butter into the sugar and roll small balls of almond butter coated in sugar. The almond butter is much runnier than peanut butter. The peanut butter will roll nicely into balls, but the almond butter will always be a little loose and malleable. That's okay--you're covering them with chocolate, remember? That cures all things.

mosaic0cd6e874cbb3eaa097140a5aafcfbf0bd3fb757a
1: Line each paper cup with a thin layer of chocolate. 2: Drop a sugar-rolled ball of almond butter (or filling of your choice) into center of each cup. 3: Dollop chocolate on top of each ball. 4: Shake tray (keeping it on the counter and horizontal) until the tops are smooth.

Drop each almond butter ball into the center of a chocolate-lined tin.

Spoon a dollop of chocolate over each almond butter ball. Don't worry if a little almond butter shows or the chocolate mounds up. We're about to fix that.

Shake the tin back and forth on the counter. This will settle the chocolate into a smooth top. Stash in the freezer for five minutes or until set enough to remove from the tray.

IMG_0221

I packaged them in holiday cellophone bags and gave them out for gifts. Don't make them too far in advance, but they keep for at least a week.

Friday, January 7, 2011

pecan bourbon chocolate pie

picnikfile_IfayXU

Americans, how were your Thanksgivings?

The answer: a long time ago.

Holiday season and finals season hit simultaneously. I apologize for my once-a-week-if-you’re-lucky updates and hope you’ll forgive me if I throw a lot of tasty pies at you.

My Thanksgiving (as well as being a long time ago) was full of excellent company and my aunt’s divine cooking, supported by sous chefs in her two terribly tall sons and terribly tall husband. My family contributed five pies to the party, because I called up my grandmother, who normally buys the pies, and begged to take over that duty. I was in the middle of the school quarter and missed having flour in every crease of my hands.

So, the day before Thanksgiving, I drove five hours home and then baked five pies. Here is the first.

picnikfile_IfayXU

A friend brought this to a New Orleans themed potluck. It takes a pecan pie (already a star in my house) and raises it to new levels with the rich additions of chocolate and bourbon. Partway through my second slice (I would cap the night with four), I asked LC for the recipe and she kindly sent it. When brainstorming Thanksgiving pies, I knew I had to include this one.

I don't like the pictures much, but I loved this pie. I highly, highly recommend it, if you are any fan of butter, sugar, pecans, chocolate, or booze. I might even recommend it if you're not a fan of any of those things.
 
BOURBON PECAN PIE
Adapted from LC’s recipe
1 1/3 C brown sugar
2 C corn syrup
8 Tb bourbon
6 eggs
2/3 C butter
2 C pecans
1 C chocolate chips

Beat all ingredients but pecans. When I added the bourbon, I got wobbly-kneed from the fumes. I wouldn't drive very soon after eating this... especially if you eat it in the quantities I like to...

IMG_0105

Fold in the pecans, then pour into the pre-baked crust. Cut a strip of aluminum foil and wrap around the outer edge of the crust to keep it from burning. Bake at 375 for about 50 minutes. 

Thursday, December 16, 2010

pupusas

IMG_1100

A lovely salvadorena named Silvia, who is the mother of a good friend of mine, taught me how to make pupusas in high school. On a sunny afternoon, we gathered in her kitchen and she taught us how to make the masa dough, how to pat our pupusas, how to cook them and then, at her backyard table, how to eat them piled high with curtido, washing bites down with cool, sweet horchata.

IMG_1090

A pupusa is a savory pancake made of fine ground masa cornmeal, filled with cheese, beans or shredded, juicy pork, and fried on a hot griddle. They can be sand-dollar sized or dinner-plate sized and are about one half of an inch in height. They are eaten warm, with a tomato sauce or a spicy, crunchy cabbage topping called curtido.

This year, I drug a horde of my university friends together and passed on the lesson. I didn't have any curtido, but we made do. For fillings, I bought a salty, crumbly white cheese, a can of beans (black, though I think refried beans are more authentic for this), and I made carnitas (shredded pork) and roasted some vegetables.

IMG_1089

This is a great party food, because everyone gets to make their own. Though some pupusas will be prettier than others, they will all taste good.

Pupusas
the dough
4 C masa harina (This will be in the baking or the "Hispanic" section of most grocery stores, especially if you live in western or southern USA. It's a very fine pale corn flour and is also used to make tamal and other doughs)
1/2 C shortening
water

Mix the masa and the shortening together with your hands. When they are combined, splash water in, mixing, until the dough comes together in a lightly moist dough that holds together when you clench it in your fist. If it crumbles, add more water.

IMG_1045

choose your fillings
carnitas
cheese
squash blossoms
beans
roasted vegetables (I chopped and roasted them at 400 for 10 minutes; bell peppers, tomatoes, sweet potatoes, onions, potatoes, jalapeno peppers, corn kernels)

IMG_1044

construction
Take a golf ball of dough if your hands are smallish, a little more if they're bigger. Roll the dough into a ball between your hands. Pat the dough into a flat disk on your palm, using the flats of your fingers. Spoon a LITTLE of whatever fillings you want onto the center of the disk. If you overfill, this is going to explode and you don't want that.

mosaice563bf01d705c398e14105b6acbac7423c16d9e4
That's actually a bit too much filling.

Fold the dough over and filling and seal it into a half circle on the other side. When you've sealed the edge of the dough, pass it back and forth between your hands, patting lightly, shaping it into a ball again. When it's vaguely ball-shaped, start rolling it between your palms to smooth it into a good sphere.

mosaice842767e76c906c6519e9b0dde09e8592558488f

Pat the ball into a disk again in your palm, using the flats of your fingers lightly. If the edge of the disk tears and filling peaks out, just poke it back in and re-seal it gently.

Place the shaped pupusa onto a hot, lightly greased griddle. Let cook about five minutes on each side. I'm still working on how to tell when a pupusa is done. Tip it up on one edge and let it fall; it should sound very solid when it hits the pan. That's the best way I can explain it. Another way is to cut a sacrificial pupusa in half to check the doneness of the pupusas that went into the pan at the same time.

Curtido is spiced, fermented cabbage (similar kim chi). Finely slice cabbage and mix with a little vinegar and spice and let sit in a bowl in your kitchen overnight at least. If I get a more specific recipe one of these days, I'll post it. But curtido tastes fantastic on warm pupusas. You'll have to trust me.

IMG_1094