Thursday, December 16, 2010

pupusas

IMG_1100

A lovely salvadorena named Silvia, who is the mother of a good friend of mine, taught me how to make pupusas in high school. On a sunny afternoon, we gathered in her kitchen and she taught us how to make the masa dough, how to pat our pupusas, how to cook them and then, at her backyard table, how to eat them piled high with curtido, washing bites down with cool, sweet horchata.

IMG_1090

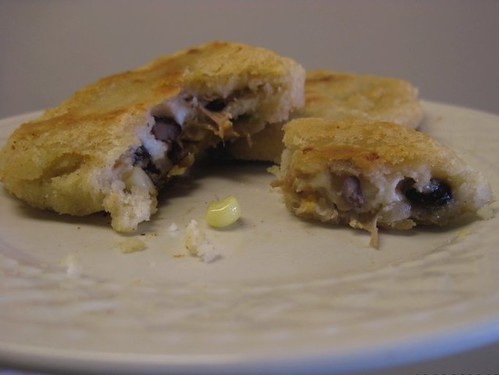
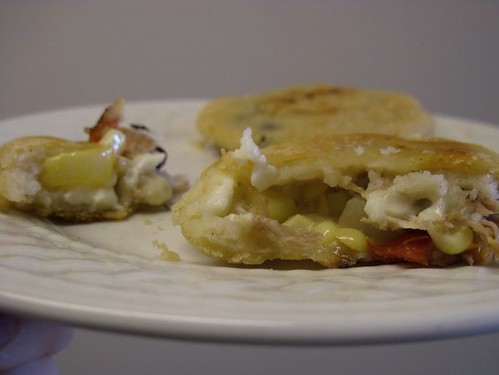
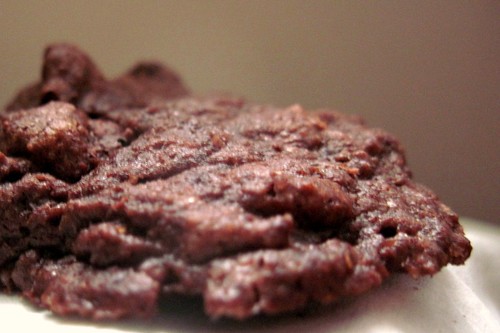
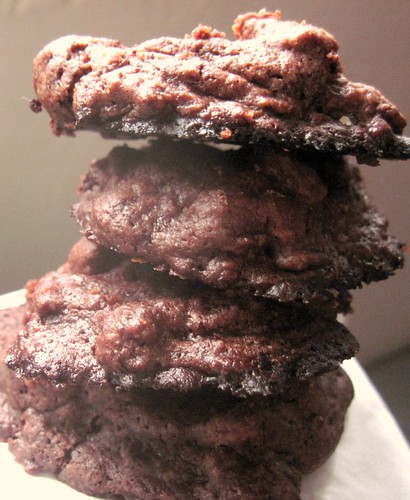
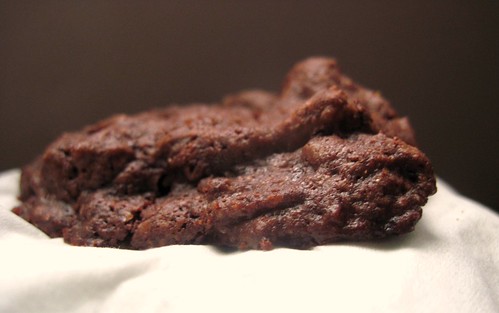
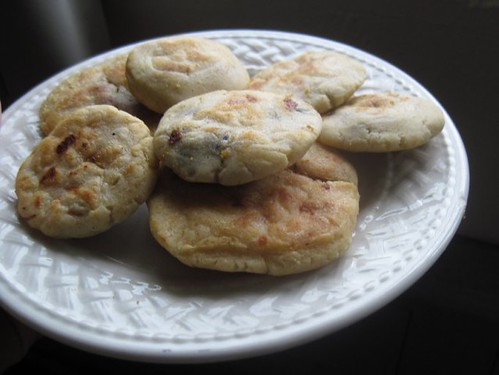
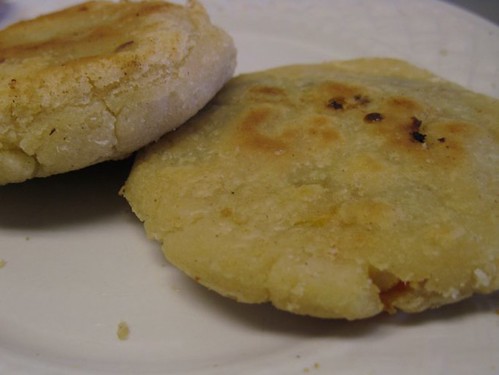
A pupusa is a savory pancake made of fine ground masa cornmeal, filled with cheese, beans or shredded, juicy pork, and fried on a hot griddle. They can be sand-dollar sized or dinner-plate sized and are about one half of an inch in height. They are eaten warm, with a tomato sauce or a spicy, crunchy cabbage topping called curtido.

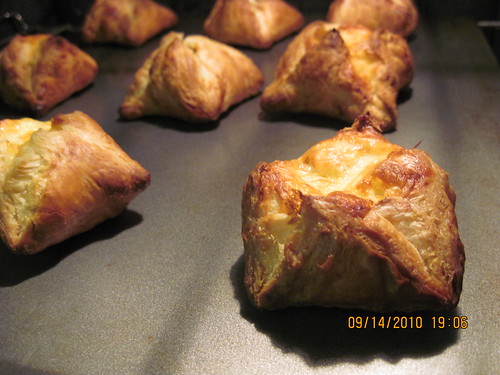
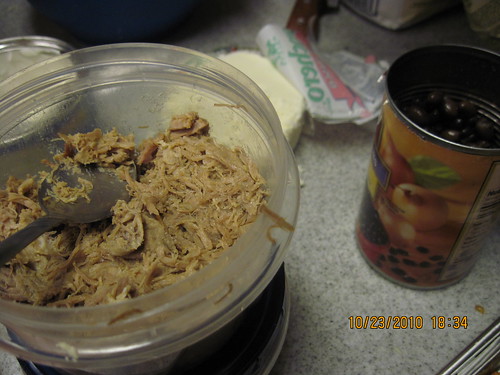
This year, I drug a horde of my university friends together and passed on the lesson. I didn't have any curtido, but we made do. For fillings, I bought a salty, crumbly white cheese, a can of beans (black, though I think refried beans are more authentic for this), and I made carnitas (shredded pork) and roasted some vegetables.

IMG_1089

This is a great party food, because everyone gets to make their own. Though some pupusas will be prettier than others, they will all taste good.

Pupusas
the dough
4 C masa harina (This will be in the baking or the "Hispanic" section of most grocery stores, especially if you live in western or southern USA. It's a very fine pale corn flour and is also used to make tamal and other doughs)
1/2 C shortening
water

Mix the masa and the shortening together with your hands. When they are combined, splash water in, mixing, until the dough comes together in a lightly moist dough that holds together when you clench it in your fist. If it crumbles, add more water.

IMG_1045

choose your fillings
carnitas
cheese
squash blossoms
beans
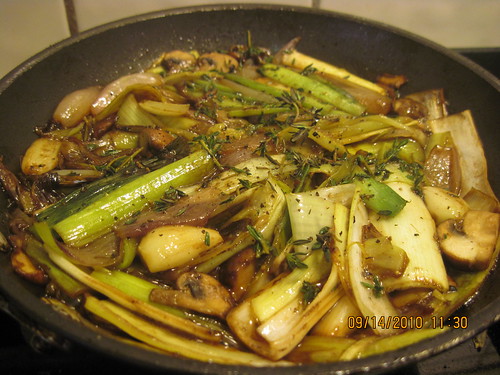
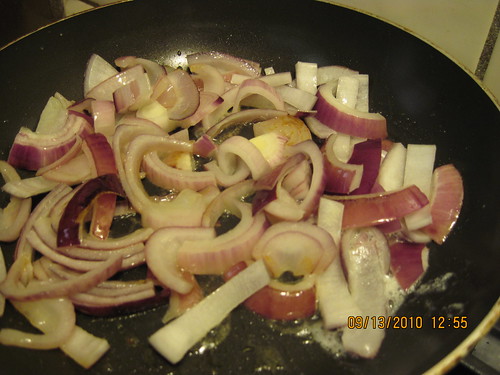
roasted vegetables (I chopped and roasted them at 400 for 10 minutes; bell peppers, tomatoes, sweet potatoes, onions, potatoes, jalapeno peppers, corn kernels)

IMG_1044

construction
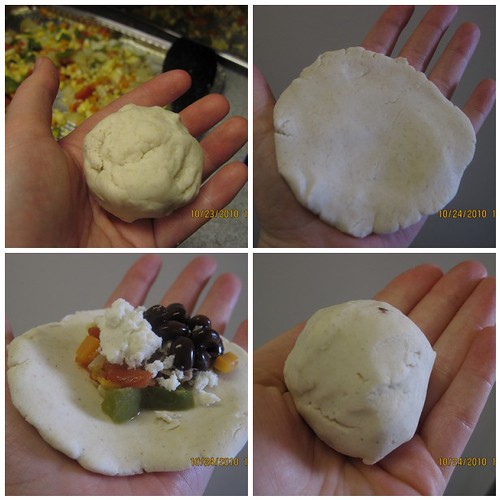
Take a golf ball of dough if your hands are smallish, a little more if they're bigger. Roll the dough into a ball between your hands. Pat the dough into a flat disk on your palm, using the flats of your fingers. Spoon a LITTLE of whatever fillings you want onto the center of the disk. If you overfill, this is going to explode and you don't want that.

mosaice563bf01d705c398e14105b6acbac7423c16d9e4
That's actually a bit too much filling.

Fold the dough over and filling and seal it into a half circle on the other side. When you've sealed the edge of the dough, pass it back and forth between your hands, patting lightly, shaping it into a ball again. When it's vaguely ball-shaped, start rolling it between your palms to smooth it into a good sphere.

mosaice842767e76c906c6519e9b0dde09e8592558488f

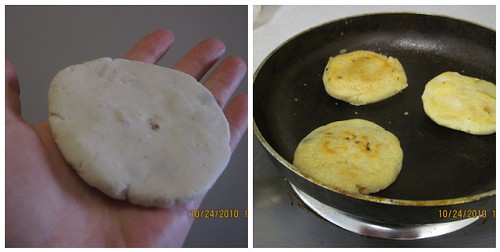
Pat the ball into a disk again in your palm, using the flats of your fingers lightly. If the edge of the disk tears and filling peaks out, just poke it back in and re-seal it gently.

Place the shaped pupusa onto a hot, lightly greased griddle. Let cook about five minutes on each side. I'm still working on how to tell when a pupusa is done. Tip it up on one edge and let it fall; it should sound very solid when it hits the pan. That's the best way I can explain it. Another way is to cut a sacrificial pupusa in half to check the doneness of the pupusas that went into the pan at the same time.

Curtido is spiced, fermented cabbage (similar kim chi). Finely slice cabbage and mix with a little vinegar and spice and let sit in a bowl in your kitchen overnight at least. If I get a more specific recipe one of these days, I'll post it. But curtido tastes fantastic on warm pupusas. You'll have to trust me.

IMG_1094

Wednesday, December 1, 2010

brie in puff pastry

IMG_0902

These puff pastry savory treats are delicious and extremely easy. I made them as one of the appetizers for my mother's 50th birthday. You'll want to make it right before serving--they're best hot, with the brie still melted and the pastry warm and soft.

IMG_0903

Brie Puffs

makes 18
1 pkg puff pastry, frozen
1 wedge of brie

Defrost the pastry overnight in the fridge.

The next day, unfold the pastry and use a sharp knife to cut it into nine squares.

IMG_0856

Take one square and place a dollop of cheese in the center of it. Fold the points together so they meet in the center, and then pinch the edges sealed.

briepuffmosaic

Repeat with the other eight squares, then with the second sheet of pastry.

Bake at 400 degrees for 10 minutes or until lightly golden. If you bake them too long, they'll get crunchy. I like them flaky and soft--these were a bit on the too-golden side for me. But still, with puff pastry and brie, you can't really go wrong.

I also did a variation of this the next day, because I only used one sheet of the pastry for the brie. I cut the pastry into 16 squares (4x4) and filled them with a mixture of chopped apples and cream cheese.

IMG_0924

They came out lovely; not too sweet and very rich. 

IMG_0927

Thursday, November 18, 2010

fudgy brownies with sweet pumpkin topping

IMG_1053

I made these in honor of fall--and chocolate. They are rich and delicious. I do love pumpkin so...

Chocolate Jacks

adapted from Joy of Baking's Fudgy Brownies

IMG_1061

12 oz chocolate, dark
1/2 C pumpkin puree from a can (make sure there aren't any added spices! You don't want pumpkin pie mix, you just want straight pumpkin)
1/4 C cocoa
3 eggs
1 C brown sugar
1/2 Tb vanilla
3/4 C flour
1/2 tsp baking powder

2 C pumpkin puree (see note above)
1 C brown sugar
4 eggs
1/4 C flour
1 tsp baking powder

12 oz. chocolate chips, melted

Preheat oven to 350.

Melt chocolate, pumpkin, cocoa and butter together. In a separate bowl, beat eggs and sugar, then add cooled chocolate-butter and vanilla to the bowl. Mix in dry goods.

IMG_1036

Beat 2 C pumpkin, 1 C brown sugar, eggs, 1/4 C flour, and baking powder together, then pour over brownie batter. Drizzle prettily with melted chocolate--or let your chocolate seize, like I did (um... on purpose? Sure, yeah, of course I did...), and drop uneven delicious little blobs down in a random pattern.

IMG_1039

Bake 40-50 minutes. Eat warm, cold, room temperature... I have an inkling they might even be good frozen--they didn't last long enough for me to try, but maybe next time.

IMG_1068

Wednesday, November 10, 2010

braised lamb shanks in a red wine and root vegetable reduction, on a bed of parmesan risotto

IMG_0913

This was the main dish for Mum's 50th. (Most of the desserts have been posted-- you see where my priorities lie?)

Actually, there I go lying again, as this was quite delicious. The main reason I've waited so long to post it is because I don't particularly like the images. The lamb was tender and tasty, the vegetables soft, roasted-sweet, and complicated in flavor, the risotto cheesy. Everything melded well together.

And, however these images lie (I was rushed, snapping photos as I plated up food for little sis to take out food to the back garden), the lamb actually looked quite stylish on the plate, with a steaming dollop of parmesan risotto topped with aromatic roasted vegetables and pearl onions. Also, you can't smell anything from these photos, so let me tell you, you're missing out.

Braised Lamb Shanks in Red Wine
8 lamb shanks
2 shallots

2 Tb butter

1 C pearl onions, skins on

1/2 large carrot
2 leeks
3 cloves garlic
3/4 C mushrooms

1/2 C tomato paste

1 C red wine
1 tsp sugar

water

salt and pepper to taste

IMG_0874

Slice the shallots roughly. Everything but the lamb is going to get cooked to rather an oblivion here (a delicious oblivion), so don't worry to much about prettiness.

Brown the shallots in butter in a large Dutch oven--one of those big heavy cast iron pots. If you haven't got one, I recommend getting one. They're terribly useful and a lot of fun.

While the shallots brown, boil a small pot of water. Drop the onions (unpeeled) in and boil for 3 minutes. Transfer immediately to a bowl of ice water.

IMG_0879

Chop the stem end off each onion and then squeeze the other end. The onion will pop out, nicely, according to the packaging. Mine sometimes took a little coaxing, or lost a few outside onion layers on the way out, but it wasn't terribly stressful. Reserve the onions and set them aside.

Leaving the shallots still browning in the pot, chop the carrot, leeks, garlic, and mushroom roughly, like you did the shallots. Add them to the pot and stir them into the tasty caramelized onions. Let them cook, stirring occasionally not not neurotically for 5-10 minutes, until they've got some brown on them for taste.
Then add the tomato paste and stir in. Let that cook 1-2 minutes, stirring, to let some of the raw flavor cook out. Then add the wine and sugar. Let the wine simmer out for about ten minutes. It will thicken some.

IMG_0893

After the wine has reduced, add enough water to cover the soft vegetables. Let the water heat up, then lay the lamb shanks on top of the vegetables. They do not need to be full immersed; you're more cooking them in the steamy air of the Dutch oven than simmering them. Lid the Dutch oven and keep the liquid at a very low simmer for 1-2 hours or until the lamb is cooked to your desired end.

(While the lamb is slowly simmering, make the risotto: see recipe below). 

When tested with a meat thermometer, the thickest part of the lamb meat should be 150-160 degrees F. (Rare is 140). (I don't like rare unless it's sushi; personal preference).

Remove the lamb to a separate plate and cover. Turn up the heat under the Dutch oven and let the by now very soft vegetables thicken into a deliciously caramelized, red wine tinted sauce. It's done when it's thick enough for your liking.

Return to lamb to the pot, turn off the heat, and lid the entire contraption until you're ready to plate.

Parmesan Risotto
1 chicken carcass
6 C water

The night before, boil the chicken in a big pot of water for 3-5 hours. It's very low maintenance. Just make sure it's got lots of water, and then go watch a movie or something in the next room. Check it now and then and add more water if it's getting low and not covering the chicken.

I like to buy one of those roast chickens at the closest supermarket, strip the meat off and bag it and use it for something later.

Strain the broth through into a container and refrigerate overnight. I get 2-3 C. It doesn't really matter for this application; you'll be watering it down with H2O in the risotto anyway.

2 C Arborio rice
2 Tb butter
1 Tb olive oil

1/2 C wine (white won't die your rice vaguely pinkish; red might fit better for the taste of this dish. So, taste or looks, your choice).
water
1 C grated parmesan

The next day, while the lamb shanks are cooking (see recipe above), saute the rice in the butter and olive oil in a large flat pan. Stir to keep it from browning. Warm the wine and chicken broth in the microwave, or in a small pot on the stove.

When the rice is golden and toasty (~10 minutes), add the wine, stirring constantly. There will be a lot of stirring constantly here, as a warning. Stir until the rice has soaked up all the liquid, then use a ladle to splash in some warm chicken broth, Keep stirring. When the rice has soaked up all the new liquid, splash in some more... and so it continues. Keep stirring and ladling and stirring. When you run out of chicken broth, ladle in warm water. When you've been doing this about fifteen-twenty minutes, start tasting a few grains every few minutes. If they're hard in the middle, they're not done. (If it's gummy, you've gone too far). Once they're tender all the way through, remove the pan from the heat and dump in the cheese. Stir. When the cheese has melted, it's time to plate, serve, and eat.

For plating, I suggest a ladle of risotto, a ladle of vegetable reduction over that, and a lamb shank laid over the reduction.

IMG_0912

Tuesday, November 2, 2010

buttermilk pancakes with homemade blueberry syrup

IMG_0968

My father's mother, my Gram, lives about three hours away from my family's home. (So does my mother's mother, my Granny; my parents are one of those high school sweetheart stories). Over the course of my childhood, we've driven up many times to spend weekends with either grandmother. One of my recurring childhood memories is waking up early in Gram's red-tiled two story house and sitting on the kitchen counter while she whipped egg whites and measured flour, making buttermilk pancakes for her numerous hungry descendants, and whoever else was going to end up, with an empty stomach and an empty plate, at her kitchen table. (Neither stays empty for long).

These pancakes are legend, and not just in my stomach's memory. One friend of the family has said to my grandmother, "I have to hold my fork down on them to keep 'em from floating off my plate!"

I made four batches of this on a lazy Sunday afternoon. Friends devoured them with blueberry syrup, raspberry and peach syrup, cherry jam (made by the lovely Biscuits), apple butter (from Gram herself), and almond butter (from the Snark). We ate and talked and laughed and did homework (and did dishes! <3). It was a lovely morning. I wish you one, too--and these pancakes are a decided step in that direction.

IMG_0987

Gram's Buttermilk Pancakes
2 C flour
1 Tb baking powder
1 tsp baking soda

2 C buttermilk
1/4 C sugar1/3 C oil
3 eggs
dash salt

Separate the eggs.

Mix the dry ingredients. Beat the yolk, buttermilk, oil, and sugar. Mix with the dry ingredients.

Beat egg whites to stiff peaks, then fold them gently into the batter.

Heat up a large frying pan or griddle until hot and lightly grease with a little butter. Ladle on batter into whatever size you'd like. If you want chocolate chips or fruit in your pancakes, add them now, just by dropping them on top of the batter.

Now, let them cook! Don't fuss at them.

IMG_0976

As you watch (impatiently, if you're me), little bubbles will form in the white gooey top of the unflipped pancake. When the little bubbles pop on the surface and STAY popped (as in, there are now small permanent tunnels in your pancake), it's time to flip.

What the bubble-tunnels mean is that the pancake has cooked enough that the batter doesn't just flow right back in to the hole the bubble has created. It (if you're relatively careful) won't fall apart on your spatula when you try to flip.

Flip on cook a few more minutes on the other side or until brown and cooked through.

IMG_0974

blueberry syrup
1 C frozen berries
1 C sugar
1/3 C water
lemon zest
lemon juice

Put all the ingredients in a heavy saucepan and mix to combine. Bring to a boil. Boil til thick. About 45 minutes-1 1/2 hours. It take forever, I know. But it's worth it, trust me! And it's not like you can't multitask. The only thing you have to pay attention to is keeping it from boiling over.

You can do this with other fruits, too. The sugar ratio is about the same for most of them. But I like blueberry.

IMG_0965

Thank you for sharing you recipe, Gram, and for many pancake mornings. I love you.

Tuesday, October 26, 2010

bite-size pecan pies in a cream cheese crust

IMG_0849

These pecan pies, baked in mini muffin cups, are called "tassies." Tassie is a Scottish word for cup, which I suppose has something to do with the size or shape of these. Pecan tassies are supposedly a French/American creation, possibly stemming from some mashing of cultures down in New Orleans, but no one's really sure. 

I think these were the favorite dessert at Mum's 50th. (Yes, there were three.) I think I liked the espresso-cream-filled eclairs (dipped in espresso-tainted white chocolate) best, but I was outvoted by the general population. (I didn't get any pictures of my little eclairs (there were also white chocolate and dark chocolate eclairs), so you don't get to see them 'til I make them again, sorry folks).

If you love pecans, brown sugar, or the idea of pie you can pop into your mouth, make these. If you just like any of these things, make these anyway. Maybe they'll change your mind.

IMG_0853

Pecan Tassies
From pastry cook by Catherine Atkinson

the pastry
1/3 C butter
3/4 C + 2 Tb cream cheese
1/2 C flour

the filling
1 eggs
1/4 C + 2 Tb firmly packed brown sugar
1/2 tsp vanilla
1 Tb butter
pinch salt
1/2 C pecan nuts, whole

Grease a mini muffin cup pan.

In a food processor, whirl the flour for a few pulses. Then add the cream cheese and butter (both diced) and pulse until a dough forms.

Roll out the dough thin, and line the mini muffin cups with circles of dough. Chill for at least a half hour.

I swear I could have eaten this pastry straight. It probably had something to do with the obscenely delicious amount of cream cheese involved.

While the pastry chills, make the filling.

The filling
Preheat the oven to 350.

Beat the eggs for a moment. Slowly add the brown sugar while beating, then add the vanilla, salt and butter.

IMG_0847

Count out 12 whole pecans. Chop the rest. Place a spoon of chopped pecans in each chilled pastry cup, then cover with the filling. Place a pecan on top of each for decoration.

Bake for 20 minutes. Cool and serve at room temperature.

IMG_0851

Wednesday, October 20, 2010

a tart of caramelized leeks, shallots, mushrooms, and garlic atop a parmesan puff pastry crust

IMG_0889

This is not the prettiest pastry in the world. I am very okay with this, because it means there's more for me, if you lot all decide to start judging food by how snazzy it ties its tie. Because even if this is not the prettiest tart I've encountered, it's darn near the tastiest. And, trust me, once you've had a bite, it just keeps getting prettier and prettier...

And actually, I'm lying a little bit (maybe I want to keep you from buying all the leeks and garlic in the world, too?). It's got some nice rustic allure to it, especially if caramelized leeks mean poetry to you, too, and when you cut into the tart, the swirls that form inside the crust--layers of buttered, parmesan pastry--are downright lovely.

This isn't even taking into account the smell of caramelized garlic and onions and browned, melt-in-your-mouth pastry floating about in the air.

IMG_0896

The tart tatin is traditionally a sweet apple tart with a parmesan crust (I think), but savory versions like this are popular, too, according to my cookbook. This is my first of either sort; I quite approve. 

Leek and Shallot Tart Tatin
adapted from Catherine Atkinson's The Pastry Cook 

the pastry
one sheet storebought puff pastry, frozen
1/2 C - 1 C parmesan cheese

Defrost the puff pastry in the fridge overnight. The next day, unfold it on a flat, clean surface. Sprinkle the cheese on top, then fold the pastry in thirds, like a wallet. Turn the pastry so that the long side is directly in front of you. Roll out so that it is the same size it was before. Wallet-fold again and stash in the fridge for thirty minutes while you make the filling.

the filling
2 Tb butter
2 shallots, quartered
5 garlic cloves, peeled but whole
1/2 leek
1/2 C mushrooms
1 tsp sugar

1 Tb balsamic vinegar
3 Tb water
a big pinch chopped fresh thyme

Slice the shallots and garlic then saute them in the butter for 5 minutes on med-low heat while you cut the leeks and mushrooms.

Quarter the leek lengthwise and put two of the quarters away. Chop the two remaining quarters into two inch lengths. Half the mushrooms and then cut them into wedges. Add to the pan and stir.

Add 1 tsp sugar. It will help the vegetables caramelize. Cook until most vegetables are brown and sweet (5-10 min).

IMG_0869

Add the vinegar and water and let it boil down (~10 min). This will soften the garlic further without burning anything. When the vinegar and water have thickened to a glaze, set the pan aside to cool. (To tell if it's thick enough, scrape your spatula across the bottom of the pan to reveal the metal. Watch how the liquid flows back into the space you cleared. If it creeps slowly, like syrup, you're set.)

Meanwhile, roll out the reserved dough big enough to fit over the pan. Set the oven to 375.

IMG_0873

When the pan is cool, lay the dough over the top. Then, dock to pastry (prick it) and bake for 25-35 minutes until risen and golden.

Let the tart cool for at least 10 minutes before you invert onto a plate and serve, sliced into wedges.

IMG_0897

Sunday, October 17, 2010

rich cocoa buttermilk cookies with dark chocolate chips

IMG_1035 - Copy (2)

By general consensus, these are rather decent chocolate cookies. My roommate says they're some of the best she's eaten. Another friend requested the recipe before the bowl-ful was half gone. One fellow took a bite and said, mouth full, "Wow."

I had four cups of buttermilk left over from making my paternal grandmother's fantastic buttermilk pancakes. (The pancakes will be updated later; this is going up now, for the friend who asked for the recipe). I wanted to do something with it, so I looked up some recipes. I ended up making these buttermilk chocolate cookies, buttermilk shortbread with jam centers, and buttermilk cinnamon coffeecake. All of these turned out quite tasty; I think buttermilk will be showing up in my fridge more often...

The cookies were richly chocolate and not too sweet. The buttermilk made them tender and toothsome. My roommate calls them "heavenly" and says they remind her of chocolate sprinkles--harder on the outside, soft and chewy on the inside. I recommend them, the next time you have buttermilk hanging about your fridge. Or when you don't. I hear they sell it in grocery stores.

IMG_1025


Wowzies
adapted from Baking Bites's Melt-in-Your-Mouth Buttermilk Chocolate Cookies
makes about 4 dozen

1/2 cup butter
1 1/2 cup cocoa powder

2 cups sugar
1 1/2 tsp vanilla extract
3/4 cup buttermilk

2 1/2 cups all purpose flour
1/2 tsp baking soda

2 cups chocolate chips

Turn your oven to 350.

Melt your butter and beat the cocoa powder into it until the mixture is smooth. Add sugar, vanilla, and buttermilk.

Dump the flour and baking soda on top and mix vigorously to incorporate. When you've beaten the lumps out with the strength of your will and the sweat of your brow (or the power of your stand mixer), stir in the chocolate chips. The darker, of course, the better. Add more or less chips to your taste. I think I added about two cups, but I didn't really measure.

Spoon the batter onto cookie sheets. Don't make them too big; the cookies will spread and rise a decent amount. 3/4-inch-diameter balls, 12 to a sheet, is about the right size I think.

Bake at 375 for 10 minutes. The centers will still be slightly soft, but the edges should be set. Let them cool and the centers should firm up into solid cookie.

IMG_1029

Friday, October 15, 2010

a salad of peaches, caramelized onions, candied pecans, and fresh avocado in a fig vinegar dressing over a bed of fresh spinach and spring greens

IMG_0909

This was the salad for my mother's fiftieth birthday.

Summer Peach-Fig Salad
spring greens and spinach
1 avocado, sliced
candied pecans (recipe below)
caramelized onions (recipe below)
braised peaches (recipe below)

The night before (or day of, if you like work), make the caramelized onions and candied pecans (see recipe below). Pour them into the same box or bag and refrigerate overnight. This saves you a lot of hassle and makes the salad-making later a very simple exercise.

When you're ready to make the salad, put the greens into a large bowl. Place the onions and pecans on top and grate on some pepper. Braise the peaches (see below) and pour peaches and dressing over the salad. Slice the avocado and lay the wedges on top. Serve and, hopefully, enjoy.

caramelized onions (easiest made the night before)
1/2 large red onion (or one small one)
1 Tb butter

IMG_0841

Chop the red onion in half lengthwise (through the stem). Put one half aside. Put the flat side of the other half face-down on your cutting board and chop into 1/4 inch slices so you form half circles. Caramelize the onion in a large frying pan with the butter, over medium heat, for about 30 minutes, or until soft and brown and sweet.

candied pecans (easiest made the night before)
1 1/4 heaping C pecans
1/4 C powdered sugar
1 Tb butter

IMG_0842

Saute the pecans in butter for a minute or so. Add the sugar and stir until dissolved. Let cool.

braised peaches; and fig dressing (make immediately before you want to serve the salad)
2 peaches
1 Tb butter
1 Tb sugar
1/4 C fig vinegar

IMG_0907

Saute peaches briefly (2-3 minutes) in melted butter, sugar, and vinegar. Pour the entire pan, juices and all, over the salad; the sauce serves as the dressing.

Saturday, October 9, 2010

individual creme brulee with fresh berries

IMG_0920

I have a fondness for creme brulee; the crack of the caramelized top, sweetly burnt, and the creaminess of the custard below. These are a bit of a deviation from the basic, as there are fresh berries tossed in with the custard, and they're baked in pastry-lined muffin tins, instead of straight-sided ceramic custard pans (this is because I didn't have enough mini custard pans).

These were tasty and quite satisfactory, though I want to play some more with methods of caramelization. Does anyone have any ideas? I think it might mostly be technique I have to practice (and Papa did most of these lovely things, anyway, as I was slaving over the risotto pot (gleefully, which is the only kind of cooking attitude I'm interested in)).

Very Berry Creme Brulee
from Pastry Cook by Catherine Atkinson

the pastry
2 1/4 C flour
1/4 C ground almonds (almond meal)
1 Tb powdered sugar
2/3 C butter diced
1 egg yolk
ice water

Stash the butter in the fridge while you gather the dry goods.

Whirl the flour, almonds, and sugar in the food processor a few pulses. Add the butter and pulse until the butter pieces are a little smaller than peas. Add the egg yolk, pulse, then sprinkle with water. Whirl again. Add more water, as needed, until the dough pulls away from the sides of the work bowl and forms a ball. Do NOT over-water. Give the flour a little bit of time to soak in the water before you add more; that's one of the ways it'll trick you into drowning it. 

IMG_0838

Roll out the dough and line your well-greased muffin pans. Chill for at least one half hour.

Dock (poke holes in the pastry) and bake in a 400 degree oven for 15 minutes. Keep an eye on it; if it starts to puff up, go in with a toothpick and let the trapped air out. I didn't have to, but recipe books keep saying my pastries will puff up if I don't weight them down with pastry weights I'm too cheap to buy. In my experience so far, with pie crusts and such, I'd say just bake them, and if there's a bubble, just stick it. All will be fine. But we've discussed the fact that I'm a lazy cook before, now haven't we?

If you'd like to weight your pastry down with pastry weights (metal or ceramic beads, or just dried beans), line the pastry with parchment paper and fill when you're blind baking (translation: baking an empty shell).

While the pastry cools, prepare the custard.

IMG_0844

the custard
4 egg yolks
1 Tb corn starch
1/4 C sugar
a few drops vanilla
1/4 C half n half

the extras
2 C fresh berries (I used raspberries and blueberries)

1/2 C powdered sugar

Beat egg yolks, corn starch, sugar, vanilla, and half n half. Warm in a double boiler, stirring constantly, until it thickens slightly. Do not let it boil.

After the pastry shells have cooled, line them with berries and pour in the custard. Let chill for at least two hours (I chilled them overnight, because I had too much to cook the next day-- this was a dessert for Mum's fiftieth birthday dinner, in which my game plan was to be as extravagantly over the top as possible).

IMG_0845

About twenty minutes before you're ready to serve, sprinkle the powdered sugar on top of the custard and caramelize it.

There are two ways to caramelize the sugar: use a small kitchen blowtorch or use the broiler setting on your oven. One is more fun. Guess which.

If you're using the blowtorch: lightly flick the flame over the sugar. Never let it sit in one place, because it will burn.

If you're using the oven: set it to your highest broiler setting and let it get hot. Then slide the custards in and watch through the oven door until they look golden and delicious. Don't wander away! It doesn't take very long and burns easy.

Let cool, then devour.

IMG_0915