Friday, February 4, 2011

pate a choux filled with chocolate cream

IMG_0240

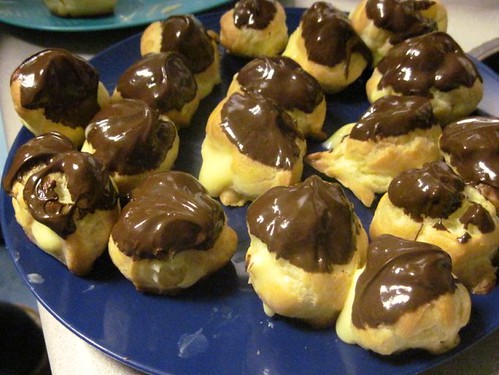
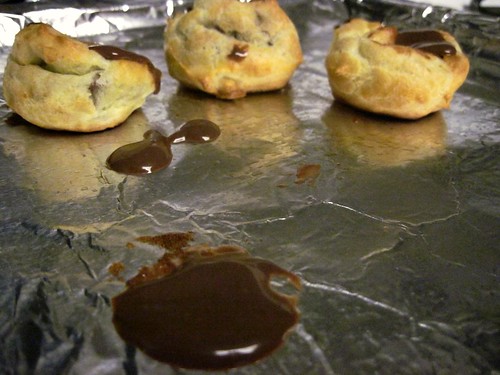
These were made alongside the eclairs. They share the same dough, pate a choux, which is a hot water pastry that you cook on the stove and then bake at a high temperature.

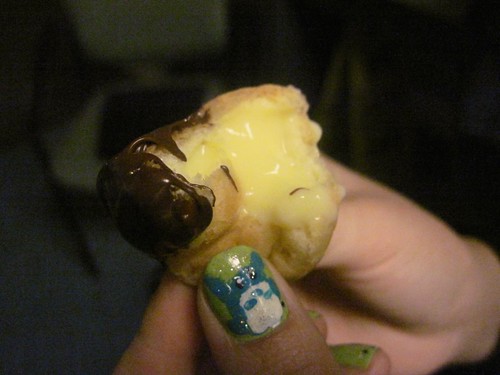
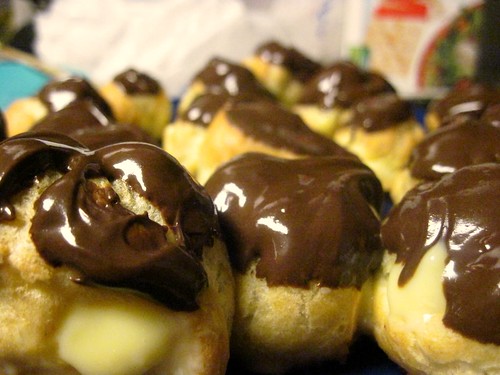
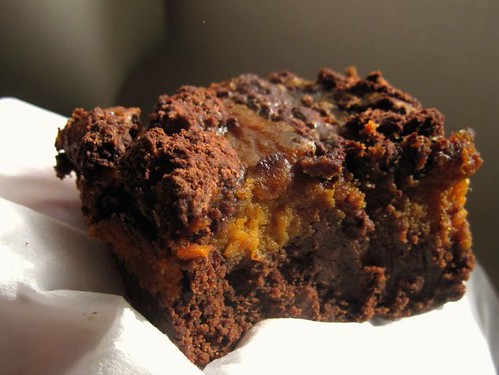
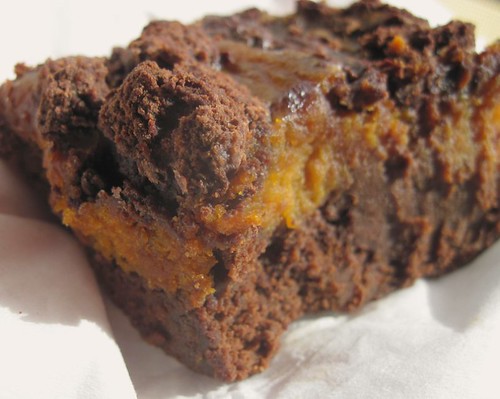
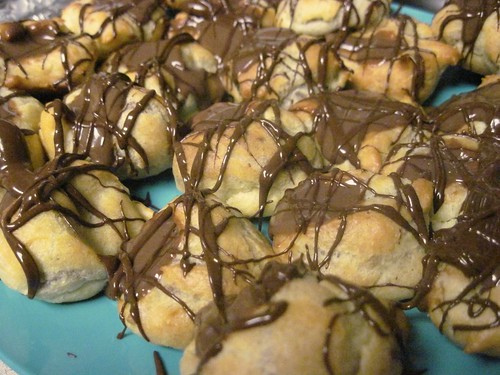
Half I filled with creme patisserie and dipped in melted chocolate; you can see the resulting eclair "puffs" here. The other half you see before you: hollow, still-warm-from-the-oven pastry filled to the gills with a creamy chocolate pudding and drizzled with melted chocolate.

(You could chill them, too, and serve them that way. I think they'd taste delightful in a slightly different way, but these didn't survive fifteen minutes so I can't say so with any certainty).

These are not one of those chocolate desserts where you can only have three bites and then you can hardly breathe or think for the pure utter richness of it. In other words, I wouldn't take this home to Mum.

However, if you're going for something a little lighter, this is lovely: Creamy but not heavy, sweet and almost complex with the cocoa and the milk fats and the sturdy dough all working together. It's certainly a chocolate dessert, but it's not overpowering. I think I would take this home to little sis.

Warning: after eating these, you will be covered in chocolate. But, really, is that a bad thing?

Chocolate Cream Pastry Pots
the pastry
from Catherine Atkinson's pastry cook
9 tbsp flour
pinch salt
1/4 cup butter
2/3 C water
2 eggs

Preheat 400 degrees. Measure our the flour into a cup and put it to the side. On the stove, set up your pot or your double boiler and melt the butter and water together. When they are melted, remove from the heat and dump in your flour. Stir, vigorously, until all is combined, and then return to low heat. Continue to stir vigourously for 1-2 minutes. Do NOT cook this too long. The dough will pull away a little from the sides; the best way I can describe it is that the edges will be rounder. It will stop sticking as strongly to the bottom of the pan. But don't worry too much about it; just stir for a minute and remove from the heat. You will be fine and so will your dough.

Take the dough off the heat. After it's cooled 2-3 minutes, add the eggs and beat until smooth and shiny, another couple minutes.

IMG_0230

Put the dough on a greased cookie sheet in the size and shapes you like. The dough will stay mostly in the same form as you put it on the sheet. I like just a single spoonful, but the traditional eclair is longer and bigger than I make my little cream-puff-eclairs. (You get more if you make them smaller). Bake for 25-30 minutes or until golden.

Some people slit the puffs open at this point and bake them at 200 degrees for 5 minutes, but I'm much too lazy. I imagine this is to dry them out a little more, but I find just the half hour at 400 does them fine.


The filling is from a food blog called Smitten Kitchen. A friend highly recommended the site to me recently and I've been archive-binging and generally drooling. A few dozen recipes in I stumbled across this one--a delicious pudding recipe I'd found through Google months before. I'd made it then (my first time making pudding) and loved it then. Now, a little thicker, is fills my pastry pots.

chocolate filling
from the Smitten Kitchen
1/4 cup cornstarch
1/2 cup sugar
1/8 teaspoon salt
3 cups whole milk
6 ounces 62% semisweet chocolate, coarsely chopped (I used good quality semisweet chocolate chips; use 70% bittersweet if you want more of a dark chocolate kick)
1 teaspoon pure vanilla extract

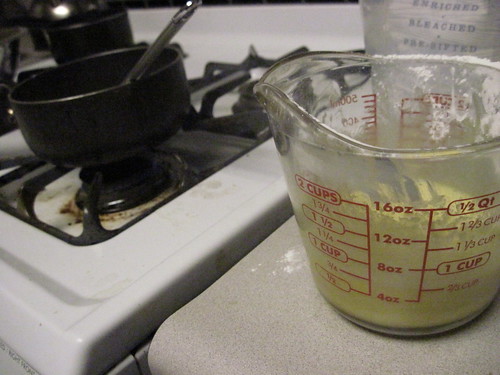
Mix milk, sugar, cornstarch and salt in a double boiler, whisking for 20-30 minutes or until thick (coats the back of a spoon). Add chocolate and let melt. Stir 2-3 more minutes.

Add vanilla. Let cool.  

construction
1/4 C chocolate
1 Tb butter

Melt the chocolate and butter together.

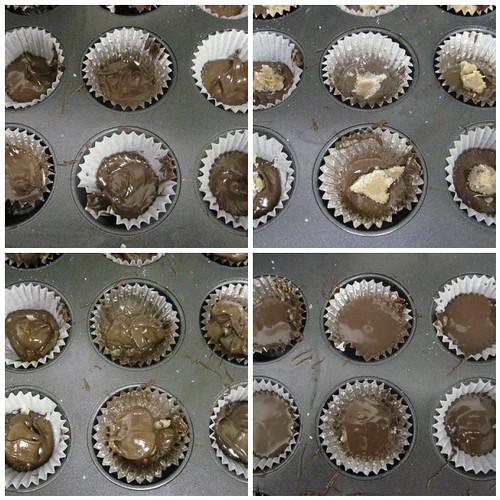
Unlike the eclairs, we are not piping in filling. Shove your finger or the back of a spoon through the roof of the pastry to make a wide hole. All we want left are walls. Then spoon the pudding in and drizzle on a little chocolate.

IMG_0242

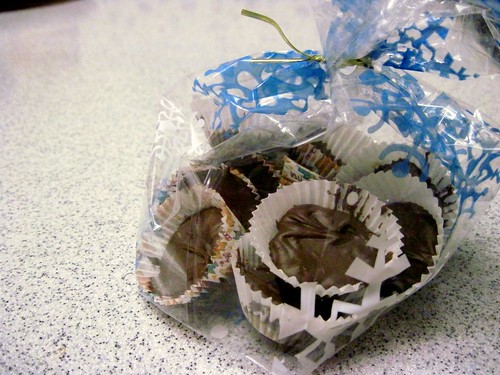
Eat warm or chill. Enjoy!

Sunday, January 23, 2011

eclairs with creme patisserie filling, topped with chocolate

IMG_0235

About three people came up to me while I was making this (and one person called and asked me later) how eclairs become hollow. This confirms my suspicion that pate a choux is absolutely awesome. You don't hollow it out, you don't shape the dough. You just make the dough, plop it on the cookie sheet and bake it. When you pull it out of the oven, you have golden, crusty, hollow pastry shells ready for you to stuff with tasty wonderful cream and dip in melted chocolate.

IMG_0236
This is an eclair that's been bitten into. This is also my roommate's thumb nail, which has Totoro on it.

Isn't that about sixteen different kinds of exciting?

The pate a choux is made on the stove. It's very egg-heavy; this is where most of the structure comes from. It's very easy to over cook and curdle the dough, so you have to be careful. Using a double boiler (a metal bowl suspended over a pot of simmering water--DO NOT let the bottom of the bowl touch the water) gives you a bit of extra insurance against this, but I just do it straight in a pot. It works well enough with this recipe and I don't lose batches very often.

There are three steps here: make the dough. Bake the dough. Fill the pastry and top with chocolate (okay, so maybe that last one's two). Here we go!

Eclairs
the pastry
from Catherine Atkinson's pastry cook
9 tbsp flour
pinch salt
1/4 cup butter
2/3 C water
2 eggs

Preheat 400 degrees. Measure our the flour into a cup and put it to the side. On the stove, set up your pot or your double boiler and melt the butter and water together. When they are melted, remove from the heat and dump in your flour. Stir, vigorously, until all is combined, and then return to low heat. Continue to stir vigourously for 1-2 minutes. Do NOT cook this too long. The dough will pull away a little from the sides; the best way I can describe it is that the edges will be rounder. It will stop sticking as strongly to the bottom of the pan. But don't worry too much about it; just stir for a minute and remove from the heat. You will be fine and so will your dough.

Take the dough off the heat. After it's cooled 2-3 minutes, add the eggs and beat until smooth and shiny, another couple minutes.

IMG_0230

Put the dough on a greased cookie sheet in the size and shapes you like. The dough will stay mostly in the same form as you put it on the sheet. I like just a single spoonful, but the traditional eclair is longer and bigger than I make my little cream-puff-eclairs. (You get more if you make them smaller). Bake for 25-30 minutes or until golden.

Some people slit the puffs open at this point and bake them at 200 degrees for 5 minutes, but I'm much too lazy. I imagine this is to dry them out a little more, but I find just the half hour at 400 does them fine.

the filling: creme patisserie
from http://www.thefreshloaf.com/recipes/eclairs
1/3 cups sugar
2 tablespoons all-purpose flour
2 tablespoons corn starch
4 egg yolks
1 1/3 cups milk
3/4 teaspoon vanilla

Beat all but milk and vanilla in a medium bowl. Heat the milk in saucepan until it starts to steam, but not boil (there should be a few little bubbles beginning to form at the edges, but nothing more).

IMG_0228

Spoon the milk a little at a time into the egg mixture, stirring briskly. Continue to spoon the milk in until you've added about half of it. We combine these two slowly to keep the hot milk from making scrambled eggs of our filling.

Pour the tempered (aka slowly heated) egg and milk mixture back to the rest of the milk in the saucepan. Bring the whole mixture to a boil and boil 1-2 minutes. Remove from the stove and mix in the vanilla. Let the mixture cool.

Spoon the mixture into a plastic bag and set aside.

IMG_0232

construction; step by step
1. Melt 1/2 C chocolate and 2 tsp vegetable oil in a small bowl.
2. Cut one corner off the plastic bag of filling.
3. Pick up a pastry puff and stick your finger through one end to make a small hole.
4. Put the cut corner of the filling bag into the hole. Squeeze and fill the pastry until it is heavy and full of cream.
5. Dip the top of the eclair in the melted chocolate and put on a plate to set.

IMG_0233

The last (and favorite) step: DEVOUR.

Monday, January 17, 2011

homemade Reese's butter cups: almond butter dark chocolate cups

IMG_0217

I love making candy. There's just something about vast quantities of sugar and an attention to elegance and design I rarely get to indulge in. This isn't saying that my candies are always very pretty (more often enough they're not at all) but I like the idea that they get prettier as I go.

I found these first at a Girl Scout "Winterfest," which is several hundred adolescent girls and their troop leaders squashed into a large auditorium where they run activity booths and sell crafts. One troop specialized in plastic jars of homemade Reese's peanut butter cups and I would buy a jar each year and horde it until spring.

Turns out, however, they're fabulously easy to make; and they're fabulously easy to engineer to your own devices. These I filled with almond butter, to give friend the Snark a close-as-I-can-get taste of Reese's. (She's allergic to peanuts). I made about eighty and packaged them up for friends and family this holiday. But you can fill them with anything you want-- lemon curd, dried fruit, jam of any kind, caramel (homemade is best!), other types of chocolate; anything you want. Isn't that a lovely phrase?

Almond butter cups
about thirty cups

1 C dark chocolate
1 Tb vegetable oil

1/2 C almond butter
1/2 C sugar

You will also need mini-muffin pans and mini-muffin paper liners. You can use a normal sized muffin pan if you want big Reese's. (I have a friend who uses a pie tin.)

Line the muffin tins with the paper muffin cups.  Pour the sugar into a wide-mouthed bowl and place the almond butter next to it with a spoon or two.

Melt the dark chocolate in the microwave or over a double boiler and mix in the oil until smooth.

Spoon a little chocolate into the bottom of each muffin tin and spread evenly over the bottom and a little up the sides.

Next, drop a little almond butter into the sugar and roll small balls of almond butter coated in sugar. The almond butter is much runnier than peanut butter. The peanut butter will roll nicely into balls, but the almond butter will always be a little loose and malleable. That's okay--you're covering them with chocolate, remember? That cures all things.

mosaic0cd6e874cbb3eaa097140a5aafcfbf0bd3fb757a
1: Line each paper cup with a thin layer of chocolate. 2: Drop a sugar-rolled ball of almond butter (or filling of your choice) into center of each cup. 3: Dollop chocolate on top of each ball. 4: Shake tray (keeping it on the counter and horizontal) until the tops are smooth.

Drop each almond butter ball into the center of a chocolate-lined tin.

Spoon a dollop of chocolate over each almond butter ball. Don't worry if a little almond butter shows or the chocolate mounds up. We're about to fix that.

Shake the tin back and forth on the counter. This will settle the chocolate into a smooth top. Stash in the freezer for five minutes or until set enough to remove from the tray.

IMG_0221

I packaged them in holiday cellophone bags and gave them out for gifts. Don't make them too far in advance, but they keep for at least a week.

Friday, January 7, 2011

pecan bourbon chocolate pie

picnikfile_IfayXU

Americans, how were your Thanksgivings?

The answer: a long time ago.

Holiday season and finals season hit simultaneously. I apologize for my once-a-week-if-you’re-lucky updates and hope you’ll forgive me if I throw a lot of tasty pies at you.

My Thanksgiving (as well as being a long time ago) was full of excellent company and my aunt’s divine cooking, supported by sous chefs in her two terribly tall sons and terribly tall husband. My family contributed five pies to the party, because I called up my grandmother, who normally buys the pies, and begged to take over that duty. I was in the middle of the school quarter and missed having flour in every crease of my hands.

So, the day before Thanksgiving, I drove five hours home and then baked five pies. Here is the first.

picnikfile_IfayXU

A friend brought this to a New Orleans themed potluck. It takes a pecan pie (already a star in my house) and raises it to new levels with the rich additions of chocolate and bourbon. Partway through my second slice (I would cap the night with four), I asked LC for the recipe and she kindly sent it. When brainstorming Thanksgiving pies, I knew I had to include this one.

I don't like the pictures much, but I loved this pie. I highly, highly recommend it, if you are any fan of butter, sugar, pecans, chocolate, or booze. I might even recommend it if you're not a fan of any of those things.
 
BOURBON PECAN PIE
Adapted from LC’s recipe
1 1/3 C brown sugar
2 C corn syrup
8 Tb bourbon
6 eggs
2/3 C butter
2 C pecans
1 C chocolate chips

Beat all ingredients but pecans. When I added the bourbon, I got wobbly-kneed from the fumes. I wouldn't drive very soon after eating this... especially if you eat it in the quantities I like to...

IMG_0105

Fold in the pecans, then pour into the pre-baked crust. Cut a strip of aluminum foil and wrap around the outer edge of the crust to keep it from burning. Bake at 375 for about 50 minutes. 

Thursday, December 16, 2010

pupusas

IMG_1100

A lovely salvadorena named Silvia, who is the mother of a good friend of mine, taught me how to make pupusas in high school. On a sunny afternoon, we gathered in her kitchen and she taught us how to make the masa dough, how to pat our pupusas, how to cook them and then, at her backyard table, how to eat them piled high with curtido, washing bites down with cool, sweet horchata.

IMG_1090

A pupusa is a savory pancake made of fine ground masa cornmeal, filled with cheese, beans or shredded, juicy pork, and fried on a hot griddle. They can be sand-dollar sized or dinner-plate sized and are about one half of an inch in height. They are eaten warm, with a tomato sauce or a spicy, crunchy cabbage topping called curtido.

This year, I drug a horde of my university friends together and passed on the lesson. I didn't have any curtido, but we made do. For fillings, I bought a salty, crumbly white cheese, a can of beans (black, though I think refried beans are more authentic for this), and I made carnitas (shredded pork) and roasted some vegetables.

IMG_1089

This is a great party food, because everyone gets to make their own. Though some pupusas will be prettier than others, they will all taste good.

Pupusas
the dough
4 C masa harina (This will be in the baking or the "Hispanic" section of most grocery stores, especially if you live in western or southern USA. It's a very fine pale corn flour and is also used to make tamal and other doughs)
1/2 C shortening
water

Mix the masa and the shortening together with your hands. When they are combined, splash water in, mixing, until the dough comes together in a lightly moist dough that holds together when you clench it in your fist. If it crumbles, add more water.

IMG_1045

choose your fillings
carnitas
cheese
squash blossoms
beans
roasted vegetables (I chopped and roasted them at 400 for 10 minutes; bell peppers, tomatoes, sweet potatoes, onions, potatoes, jalapeno peppers, corn kernels)

IMG_1044

construction
Take a golf ball of dough if your hands are smallish, a little more if they're bigger. Roll the dough into a ball between your hands. Pat the dough into a flat disk on your palm, using the flats of your fingers. Spoon a LITTLE of whatever fillings you want onto the center of the disk. If you overfill, this is going to explode and you don't want that.

mosaice563bf01d705c398e14105b6acbac7423c16d9e4
That's actually a bit too much filling.

Fold the dough over and filling and seal it into a half circle on the other side. When you've sealed the edge of the dough, pass it back and forth between your hands, patting lightly, shaping it into a ball again. When it's vaguely ball-shaped, start rolling it between your palms to smooth it into a good sphere.

mosaice842767e76c906c6519e9b0dde09e8592558488f

Pat the ball into a disk again in your palm, using the flats of your fingers lightly. If the edge of the disk tears and filling peaks out, just poke it back in and re-seal it gently.

Place the shaped pupusa onto a hot, lightly greased griddle. Let cook about five minutes on each side. I'm still working on how to tell when a pupusa is done. Tip it up on one edge and let it fall; it should sound very solid when it hits the pan. That's the best way I can explain it. Another way is to cut a sacrificial pupusa in half to check the doneness of the pupusas that went into the pan at the same time.

Curtido is spiced, fermented cabbage (similar kim chi). Finely slice cabbage and mix with a little vinegar and spice and let sit in a bowl in your kitchen overnight at least. If I get a more specific recipe one of these days, I'll post it. But curtido tastes fantastic on warm pupusas. You'll have to trust me.

IMG_1094

Wednesday, December 1, 2010

brie in puff pastry

IMG_0902

These puff pastry savory treats are delicious and extremely easy. I made them as one of the appetizers for my mother's 50th birthday. You'll want to make it right before serving--they're best hot, with the brie still melted and the pastry warm and soft.

IMG_0903

Brie Puffs

makes 18
1 pkg puff pastry, frozen
1 wedge of brie

Defrost the pastry overnight in the fridge.

The next day, unfold the pastry and use a sharp knife to cut it into nine squares.

IMG_0856

Take one square and place a dollop of cheese in the center of it. Fold the points together so they meet in the center, and then pinch the edges sealed.

briepuffmosaic

Repeat with the other eight squares, then with the second sheet of pastry.

Bake at 400 degrees for 10 minutes or until lightly golden. If you bake them too long, they'll get crunchy. I like them flaky and soft--these were a bit on the too-golden side for me. But still, with puff pastry and brie, you can't really go wrong.

I also did a variation of this the next day, because I only used one sheet of the pastry for the brie. I cut the pastry into 16 squares (4x4) and filled them with a mixture of chopped apples and cream cheese.

IMG_0924

They came out lovely; not too sweet and very rich. 

IMG_0927

Thursday, November 18, 2010

fudgy brownies with sweet pumpkin topping

IMG_1053

I made these in honor of fall--and chocolate. They are rich and delicious. I do love pumpkin so...

Chocolate Jacks

adapted from Joy of Baking's Fudgy Brownies

IMG_1061

12 oz chocolate, dark
1/2 C pumpkin puree from a can (make sure there aren't any added spices! You don't want pumpkin pie mix, you just want straight pumpkin)
1/4 C cocoa
3 eggs
1 C brown sugar
1/2 Tb vanilla
3/4 C flour
1/2 tsp baking powder

2 C pumpkin puree (see note above)
1 C brown sugar
4 eggs
1/4 C flour
1 tsp baking powder

12 oz. chocolate chips, melted

Preheat oven to 350.

Melt chocolate, pumpkin, cocoa and butter together. In a separate bowl, beat eggs and sugar, then add cooled chocolate-butter and vanilla to the bowl. Mix in dry goods.

IMG_1036

Beat 2 C pumpkin, 1 C brown sugar, eggs, 1/4 C flour, and baking powder together, then pour over brownie batter. Drizzle prettily with melted chocolate--or let your chocolate seize, like I did (um... on purpose? Sure, yeah, of course I did...), and drop uneven delicious little blobs down in a random pattern.

IMG_1039

Bake 40-50 minutes. Eat warm, cold, room temperature... I have an inkling they might even be good frozen--they didn't last long enough for me to try, but maybe next time.

IMG_1068