Thursday, September 15, 2011

dark chocolate truffles: plain, orange, and raspberry

IMG_0376

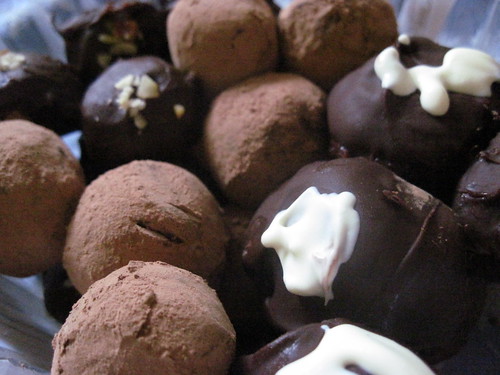
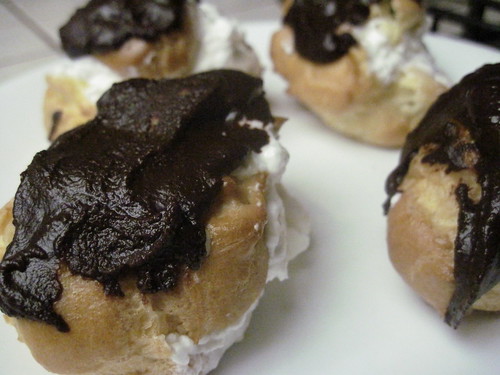
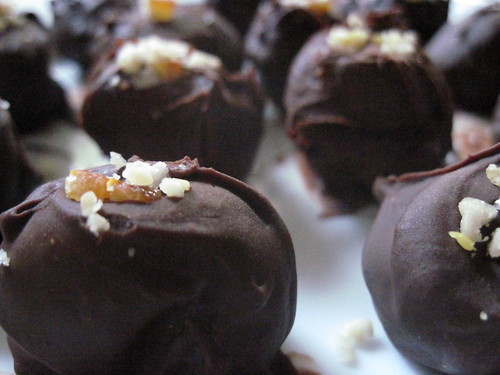
Truffles are one of those things that are a mix between hard and easy. On one hand, they're terribly messy and involve lots of fridge time, and you'll probably have to deal with some siezed chocolate and that's rarely fun. However, at it's core, a truffle recipe is this: melt chocolate and cream together. Chill. Roll into balls. Chill. Roll in cocoa powder/melted chocolate/nuts/etc. Chill.

Then you eat them, of course.

IMG_0369

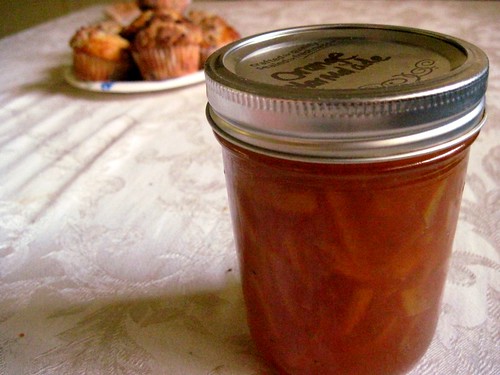
These were Mum's birthday present. Her birthday cake was a selection of excellent cupcakes (mud pie, PB, red velvet, carrot, and lemon pistachio) from a Berkeley bakery.

Truffles

12 oz chocolate
6 oz heavy cream

(The chocolate:cream ratio is 2:1, if you want to change the size of the recipe. I just poured a bunch of chocolate chips into a bowl on a scale and then poured on half that of cream).
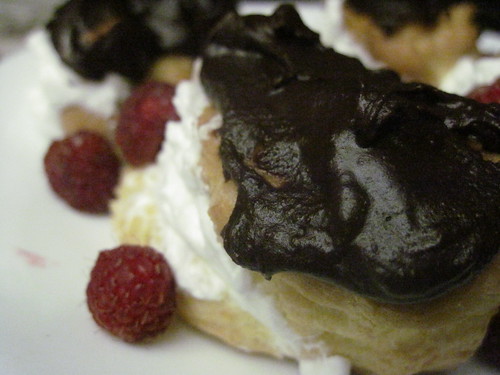
raspberries
3 oz extra chocolate

orange Vitamin C tablets, crushed (~6, but taste to find out what you like)
1/4 tsp vanilla
a few drops lemon extract
1 Tb extra chocolate

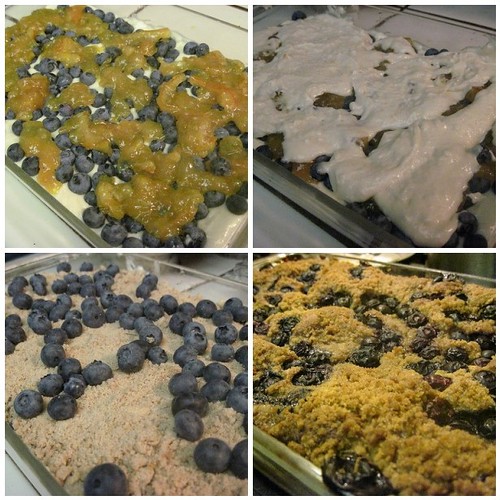
Heat the cream up in the microwave or on the stove. Do not allow it to boil. Remove from the heat and pour in your chocolate chips. Let them sit for a moment (to get soft; you can stir immediately if you want, it just won't do you much good) and then stir until the mixture is smooth.

This is your basic truffle ganache. From here, you can just slip it into the fridge for at least an hour and get on with the rest of the recipe. However, if you want flavored truffles, here is where you get them.

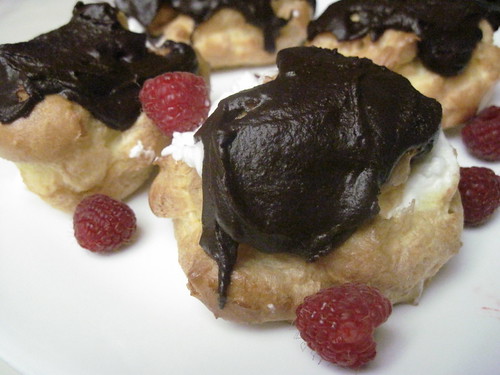
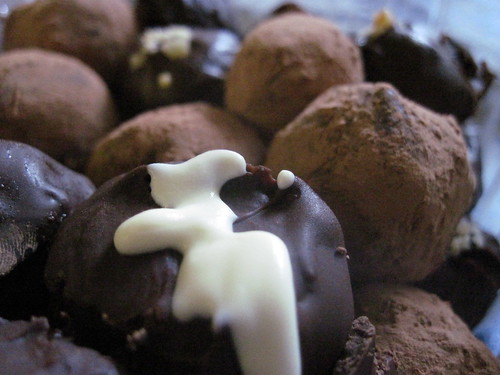
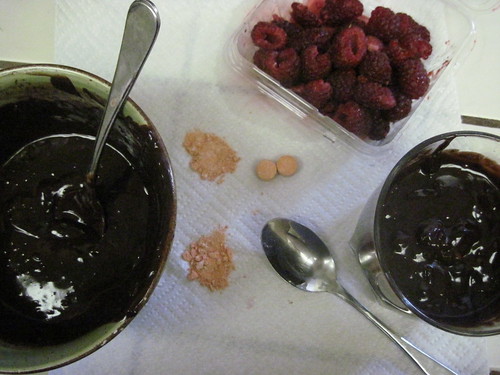
I separated my truffles into three bowls. One I left plain. One had crushed red raspberries mixed into it (and extra chocolate, because the raspberries diluted the ganache). The last was made into an orange truffle, with Vit C tablets, lemon extract, vanilla, and chocolate.

IMG_0362

Everything now goes in the fridge for at least an hour. Doing this the day beforehand works as well.

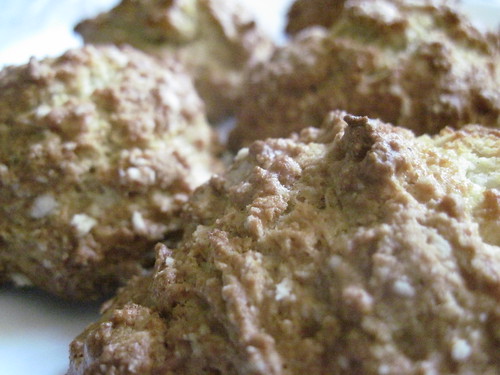
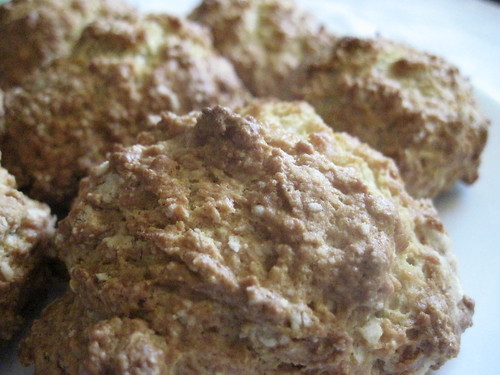
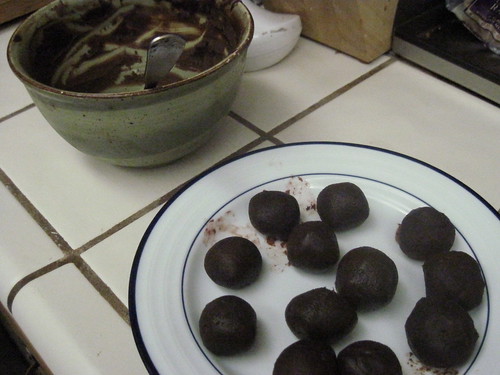
Later: Remove one bowl from the fridge at a time. Using a spoon, scoop out a small portion of the chilled ganache and roll it quickly between your hands into a ball. It will begin to melt all over your hands, so do it quickly. Place the ball on a plate (hint: cover the plate with wax paper, to keep things from sticking). Roll all of the ganache into balls then move the plate to the fridge. Repeat with the other mixtures.

IMG_0364

Let them cool for another hour.

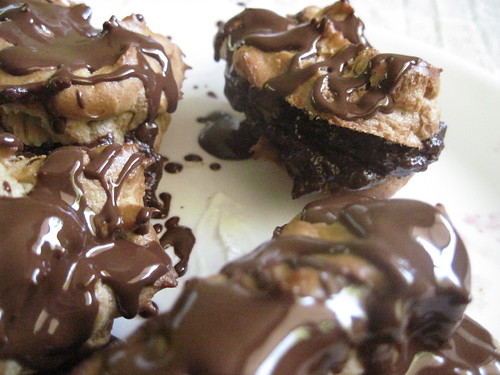
After they've chilled, you can roll them in whatever you like: melted chocolate, cocoa powder, powdered sugar, ground nuts... Chill them again and then devour happily.

IMG_0368

A note about melting chocolate: if you get a drop of water in your chocolate when you are melting it, then it will sieze. It will get stiff and sort of almost fluffy, which is sort of cool, except when you want it to get smooth and sort of liquidy so you can roll truffles in it. If it siezes, just wrap it in plastic and stick it in the fridge. You can use it in something later. Get a new bowl, a new spoon, and new chocolate. Repeat the melting process.

The two best ways of melting chocolate that I know are in the double boiler on the stove top or very slowly in a microwave.

Double boiler: Fill a small pot an inch deep with water. Bring it to a simmer. Put a metal bowl on top of the pot. Make sure the bottom of the bowl does NOT touch the water. Pour chocolate into the bowl and stir until melted.

Microwave: With a clean, dry spoon and a clean, dry bowl, place a bowl of chocolate in the microwave. Microwave in ten second increments, stirring between each. Resist the urge to taste the chocolate on the spoon, because you might get water on it. Remove from the microwave a little before it's completely melted; the heat of the chocolate will finish off any remaining little chunks of solid chocolate.

IMG_0374

Sunday, September 11, 2011

vietnamese summer rolls with red pork and shrimp

IMG_0359

"Spring roll" is a blanket Western term used to describe rolled, filled Asian appetizers. There are many and extremely dissimilar varieties of these spring rolls, from the Chinese chūn juǎn the term was derived from, to sweet rolls filled with red bean paste (eastern and northern China), to the Filipino lumpiang prito, a deep fried roll that can be filled with bean sprouts and grated vegatables. This recipe is for goi cuon, or Vietnamese spring, summer, or salad rolls.

IMG_0358

Vietnamese salad rolls are rice paper filled with shrimp, boiled pork (I cheated and added a bit of extra flavor by roasting the pork in a sweet glaze), various herbs, and rice noodles. They are also delicious, and easy and fun to make. Throw a party; have friends wrap their own; eat them in the backyard with Vietnamese iced tea and spicy peanut dipping sauce.

IMG_0361

Goi Cuon
adapted from Wandering Chopsticks
rice paper (It looks almost like thin, hard sheets of plastic. Do not be fooled! This is what you want and it is delicious)
rice vermicelli noodles (also labelled as rice sticks)
two carrots, grated
Vietnamese basil, mint, cilantro, rau ram (or any other collection of tasty green herbs)
1 lb shrimp
red pork (see recipe below)

set up
Boil the rice sticks for about one minutes, or until soft. Drain and set aside. Make the red pork (see recipe below). When cooled, slice the red pork thinly.

IMG_0349

Arrange all of the fillings (noodles, grated carrots, rinsed herbs, shrimp (I grilled mine, but cook them however you like), and red pork) and the rice paper in nearby reachable places. Fill a bowl with clean, cool water.

Construction
Lay a sheet of rice paper in the water. Hold it under the water for fifteen seconds and then remove it to a clean, flat surface. The rice paper will still feel rather plastic-like and stiff, but it will soften as you go. In the center of the rice paper (a little lower than I have shown), lay three shrimp (or two, if yours are larger). Add carrots, slices of pork, the herbs, and the noodles.

goicuonmosaic

Don't overstuff; experiment with a few rolls to figure out how much stuffing you should put in.

IMG_0356

Next, fold three edges slightly in and then roll it up as tightly as you can. The faster you construct these, the less likely they will be to tear because the rice paper will be still stiff.

IMG_0357

To make a peanut sauce for dipping, I mixed chunky peanut butter with coconut milk, a dash of fish sauce, and sriracha.

red pork
adapted from Smitten Kitchen
This makes more than you need for the rolls but, well, I really like pork.

IMG_0348

2 lb pork butt, sliced into long segments about 1 inch in diameter.
marinade:
1/3 C sake
1/3 C soy sauce
1/3 C hoisin sauce
1 Tb fish sauce1 tsp sriracha

Marinate the pork for between one hour and six hours.

I ran out of hoisin (I only had about two tablespoons), so I replaced the rest with: 2 Tb barbecue sauce, 1/4 C brown sugar, packed, and an extra dash of fish sauce.

Preheat your oven to 375 when you're about ready to start the pork (about XXX hours before you want the rolls ready). Put water in a shallow dish (a brownie pan, perhaps) at the bottom of the oven. Balance a rack (cookie cooling sheet, for example) on top of the dish. Lay the marinated pork out on the rack and cook in the 375 oven for thirty five minutes.

Bring the marinade to a boil in a pot. Brush the pork with the marinade, flip, and then brush the other side. Do this several times during the baking. I brush it the first time about ten minutes in, and then repeat every five to ten minutes, or whenever I'm bored with whatever else I'm doing in the kitchen.

To finish off, bring the oven to 400 degrees and roast until the outside of the pork is caramelized, about ten minutes. Slice the biggest piece of pork in half to check for doneness (there should be no pink) or use a meat thermometer.

IMG_0346

Let the pork rest while you prep everything else.

Friday, September 2, 2011

buttermilk scones

IMG_0323

Scones are a morning baked good for me. They're probably one of things I bake most often, and they're one of the things I associate most with half falling asleep with my hands in dough.

IMG_0329

For scones, I like to get up rather before I have to and enjoy the morning darkness and the morning light--grey is one of my favorite colors, and morning grey a favorite within the greys. This recipe takes about 45 minutes for me, from my alarm clock going off to having hot scones heaped on a plate.

IMG_0328

This is another in the continuing series of stuff-the-protagonist-bakes, inspired by a short story by the writer gyzym. This post traces its roots to the protagonist's "scones with the proper amount of vanilla," and my own undying love of buttermilk.

IMG_0330

Cream Scones
adapted from Joy of Baking's Cream Scones recipe , and gyzym's story "I've Got Nothing To Do Today But Smile (The Only Living Boy in New York)."
makes 10-12 scones

IMG_0322

2 C flour
1/4 C sugar
2 tsp baking powder
a few grates of fresh nutmeg
1/3 C butter, cold and cubed
1/2 C buttermilk
1 egg
1 tsp vanilla

Preheat your oven to 375. 

Combine the dry goods (flour, sugar, and baking powder) in a large bowl. Grate on a little fresh nutmeg. Add the cold butter, cut into small chunks, and use your fingers, a pastry cutter or a fork cut the butter into the flour until the whole mixture looks like big breadcrumbs.

Next, in a separate bowl, mix the buttermilk, egg and vanilla. Pour the liquid into the center of the dry goods. Fold the flour and the liquid together, trying to stir as little as possible.

Spoon the scones onto a baking sheet and shape into round mounds or triangles as you prefer. They will spread while baking so give them some room.

IMG_0320

I like mine best hot out of the oven with a little butter and jam and an early morning.

dark chocolate eclairs

IMG_0333

I had to make two types of eclairs here, because I wanted some filled with dark chocolate custard, but Mum required some with whipped cream and raspberries. Heartbreaking, isn't it?

IMG_0311

The pastry shell used, choux pastry, is the same for both. I just filled one with creme patisserie (the traditional eclair filling) that I added cocoa powder and melted dark chocolate into, and filled the other sort with homemade whipped cream and some fresh raspberries. I topped both with melted dark chocolate. 

IMG_0304

This post in another entry in my stuff-the-protagonist-bakes collection; I'm baking every baked good mentioned in a story written by gyzym. This post answers the prompt "dark chocolate eclairs."

IMG_0302

Dark Chocolate Eclairs and Whipped Cream Eclairs
adapted from pastry cook by Catherine Atkinson, gyzym's story "I've Got Nothing To Do Today But Smile (The Only Living Boy in New York)," and Joy of Baking's Pastry Cream Recipe.

9 Tb flour
1/4 C butter
2/3 C water
2 eggs

Preheat your oven to 400 degrees.

Melt the butter in the water in a small pot on the stove. Bring the butter and water to a boil, then remove from the heat and dump in the 9 Tb of flour. Stir vigorously until combined, then put back on the heat. Continue to stir for about 2 minutes. It will get a little shinier and pull away from the sides of the pot instead of sticking to them. Don't worry too much, just stir for a minute or two and then take it off. I think you're just cooking the flour a little bit so that it doesn't taste too raw. (If anyone else has any other theories about the science behind this brief cooking period, let me know).

Take the pot off the heat and let it cool for a minute or two. Then add the two eggs, which should be lightly beaten before you add them if you're a conscientious cook, or just cracked directly in and stirred quickly if you're lazy like me. Stir the eggs and pastry for a couple minutes, until everything is smooth and a little thicker. At first it will look like it won't combine, but just keep stirring. It will come together.

Spoon the slightly stiff batter onto a cookie sheet and shape however you like. Cream puffs tend to be ball-shaped; eclairs tend to be longer. Bake at 400 for 25-30 minutes or until golden brown.

While the eclairs bake, you'll want to make the fillings.

IMG_0334

chocolate creme patisserie
3/4 C milk
1/2 C heavy cream
3 egg yolks
1/4 C sugar
2 Tb cocoa powder
2 Tb cornstarch
3/4 C chocolate, dark
1/2 Tb brandy
1 tsp vanilla

Beat the egg yolks and sugar together. Next, beat in the cocoa and cornstarch. Meanwhile, bring the milk to just barely simmering on the stove. Don't boil the milk, it doesn't like it.

When the milk is hot spoon a little into the egg mixture, whisking the egg until combined. Spoon a little more in, whisk. Continue until you've got about half of the hot milk in there, then pour the egg-and-milk into the rest of the milk and stir. Return mixture to a boil and boil for a half a minute or a minute. It should thicken. Remove from the heat and add the liquor, vanilla and the chocolate. Stir until the chocolate is all melted. Let it cool before you fill the eclairs.


IMG_0315

whipped cream
1 C whipping cream
1/8 C sugar

Whip the cream and sugar together until soft peaks form, about eight minutes or so (depending on your mixer).

To fill the eclairs, you can either put the filling into a bag and snip off the tip, then poke that end of the bag into the eclair and squeeze in the filling, or you can slice the eclair along one side and spoon the filling in. I chose the latter,  as I am (as previously stated) lazy and the second way doesn't involve any extra hardware but for the spoon.

IMG_0309

Melt chocolate with a dash each of oil and cream and then spoon it over the top of each eclair. (The darker, thicker chocolate shown on the whipped cream eclairs is more chocolate and cream, less oil. The thinner chocolate on the chocolate-filled eclairs had more oil. Your choice).

IMG_0301

Thursday, September 1, 2011

blueberry-orange coffeecake, round two

IMG_0286

This is less of a coffeecake and more of a cake. This isn't to say it wasn't delicious with hot coffee in the morning. But the streusel sank into the batter when it baked, so the cake is full of tasty brown sugar-cinnamon flavor but there isn't any of that distinctive coffeecake crunch. So, here we are: tasty blueberry-orange cake.

It's sweet (but not too sweet; the marmalade adds some bitterness) and a little chewy (which I think is the fault of the marmalade, and the extra egg in the batter). The blueberries, marmalade, and streusel all fall to the bottom, which seems to leave streaks of bittersweet orange and brown sugar through the cake. The top browns nicely into a sweet crust. 

IMG_0288

This is the second version of blueberry-orange bread that I've tried, both being inspired by a short story about a stress baker and a coffeehouse owner who fall in love.

Blueberry-Orange Cake
adapted from Betty Crocker's Cookbook, gyzym's short story "I've Got Nothing To Do Today But Smile (The Only Living Boy in New York)," and Alton Brown's marmalade recipe.
1 C flour
1/2 C sugar
1 1/2 tsp baking soda
1/6 C butter, softened
1/2 C buttermilk
1 egg

1/2 C marmalade
1 egg
1 Tb brown sugar
about 6 oz blueberries

1/4 C brown sugar
1/4 C flour
2 Tb butter

Preheat your oven to 350.

IMG_0285

Like before, beat flour, sugar, baking soda, butter, buttermilk, and egg for two minutes, until mostly smooth. Pour all of the batter into a greased 8x8 pan.

Mix marmalade, second egg, and 1 Tb brown sugar until combined, then pour over the better. Sprinkle blueberries on top of that.

IMG_0292
the front

Pound the 1/4 C brown sugar, 1/4 C flour, and 2 Tb butter together with a sturdy whisk or a fork until it looks like big breadcrumbs. Sprinkle evenly over the marmalade and blueberries.

Put the pan into a 350 degree oven and bake for 30 minutes.

IMG_0291
the back

Wednesday, August 31, 2011

coffeecake with blueberries, brown sugar streusel, and orange marmalade

IMG_0279

The details of this are based off the coffeecake recipe from Betty Crocker that was the first baked good I ever made by myself. The dream of this dish is the phrase "orange-blueberry bread." I recently read a rather endearing love story about an overworked lawyer who stress-bakes and the fellow who owns the coffeehouse across the street. It's one of two stories that makes me want to run off and start a coffeehouse bakery, the other being Robin McKinley's Sunshine (an adventure/thriller/vampire novel starring a snarky baker). To entertain myself, I decided to try to bake every baked good mentioned in the coffeehouse love story. And here is the first go: orange blueberry bread.

IMG_0276

(Others to come will include: dark chocolate eclairs, cream cheese danishes with apricot glaze, and a really awesome cake).

The coffeecake is my basic Betty Crocker blueberry coffeecake, except with orange marmalade added to the center, buttermilk instead of plain milk in the batter, and lemon zest in the streusel. The center comes out a little gooey, which I think I'll work on in later attempts (maybe less marmalade? maybe mix an egg into the marmalade before adding it?). In attempting to deal with the extra moistness, I overcooked the cake a bit, so another attempt may be featured soon. The buttermilk in the batter made me quite happy and I think I'll keep that with every use of this batter from now on.

IMG_0275

Orange-Blueberry Coffeecake
adapted from Betty Crocker's Cookbook, gyzym's short story "I've Got Nothing To Do Today But Smile (The Only Living Boy in New York)," and Alton Brown's marmalade recipe.

2 C flour
1 C sugar
3 tsp baking powder
1/3 C butter, softened
1 C buttermilk
1 egg

blueberries (1-2 C)
orange marmalade (store-bought, or make you own)

In a large bowl, beat the flour, sugar, baking powder, butter, buttermilk, and egg for two minutes or until smooth. Grease a 9x13 pan and then pour in a little more than half the batter, using a spatula to cover the whole bottom of the pan with batter.

coffeecakemosaic

Sprinkle on the blueberries and some marmalade (perhaps a little less than pictured above; my cake was a little overly moist). Carefully drape the best of the batter over the blueberries. There will be plenty showing through and that's alright. Sprinkle on all the streusel (see recipe below) and then any leftover blueberries can go on top.

Bake in a 350 degree oven for 35-40 minutes.

IMG_0273
streusel
1/3 C brown sugar, packed
1/3 C flour
1/2 tsp cinnamon
1 lemon's worth of lemon zest
3 Tb butter

Pound all ingredients with a fork or a whisk until the mixture resembles bread crumbs. If the clumps are too large and moist, add a little flour to dry it out.

IMG_0280

Thursday, May 19, 2011

orange marmalade

IMG_0164

So, obviously, by "soon" I meant I'd get this post up in a month. I'm sorry I've been so sparse lately. I have been cooking (quite a lot; let me tell you sometime about the cupcake-birthday-cake that I shaped and frosted like the Settlers of Catan game board-- or the Portal-themed cake (yes, it was a lie)-- or the war won ton soup that actually tasted like war won ton soup) but my camera's an angsty little old thing and so I don't have anything pretty to post up for you.

This I made back in Christmastime, though, for Mum, who is a huge orange marmalade fan. As a child, I never liked it, but after this I think I've been converted to its golden, sticky, bittersweet ways.

IMG_0183

Marmalade comes from Greek quince jam (which was subsequently adopted by the Romans), called "marmelo." This means honey-fruit, as the quince was too bitter to be made into jam without honey.

In other countries, marmalade can refer to any fruit preserves, but in the majority of English-speaking cultures it refers primarily to citrus-based jams.

This recipe is adapted from Alton Brown's (yes, I am a Good Eats junkie. I accept this about myself). I swapped out some of the water for orange juice, and added cinnamon, salt, and a little pepper. Trust me, the pepper works.


Orange Marmalade

Adapted from AB's recipe: http://www.foodnetwork.com/recipes/alton-brown/orange-marmalade-recipe/index.html
4-5 large oranges
zest and juice of one lemon
2 C orange juice
4 C water
3 pounds plus 12 oz sugar
1 tsp cinnamon
1/2 tsp salt
a few grates of black pepper

canning jars (found in most grocery stores)
candy thermometer

Slice oranges into very thin disks. If you have a mandolin, that will be useful, but otherwise you can make due with a sharp knife. The slices should ideally be about 1/8th of an inch thick, but don't stress too much about it. Just try to make the slices all about the same size. Quarter those slices.

Put into a large pot with the lemon zest and juice, orange juice, and water. Boil for 10 minutes, then reduce heat to a simmer and let cook for 40 minutes. The fruit should be soft.

Meanwhile, fill a separate pot with water and the canning jars and lids. Bring to a rolling bowl for 10 minutes, then turn off the heat and let sit until the marmalade is done. This is to sterilize the jars.

Put a plate in the freezer. You'll need this later to check the marmalade.

Return the oranges to a boil. Add the sugar, cinnamon, salt and pepper and cook until the mixtures reaches 222 or 223 degrees. This should take 10-15 minutes. The way you test the marmalade's doneness is to put a teaspoon on the chilled plate and let sit for half a minute. Tilt the plate. If the marmalade runs, keep cooking. If it wobbles like a gel, you're done. (Imagine what you want your tasty, spreadable marmalade to look like; that's about the consistency it should come to on the chilled plate). Take it off the heat.

Place a towel out on the counter. Using a pair of tongs, remove your jars from the hot water and set them out, upright, on the towel. Ladle in marmalade until there's about half an inch of air gap left between the jam and the top of the jar. Use the tongs to put on the lids and then screw them gently tight.

IMG_0160

Return the filled jars to the water. Bring the water to a boil again. Boil each jar 10 minutes. This will seal them. Remove from water and let sit until cool. If any of the lids are not flat and taut, then that jar didn't steal. Don't worry, just stick it in the fridge and eat it immediately. The other jars will stay good on the shelf for a few months. Once open, they must be refrigerated as well.

The marmalade is sweet and candy-like with a bitter edge. I'm a big fan. I hope you will be, too.